Microsoft Azure AD - OIDC (v1.0)
Prerequisites
Section titled “Prerequisites”- A Microsoft Entra ID tenant
- Admin privileges to configure applications in Azure AD
- Access to the Azure portal
Configuration steps
Section titled “Configuration steps”1. Register an application in Azure AD
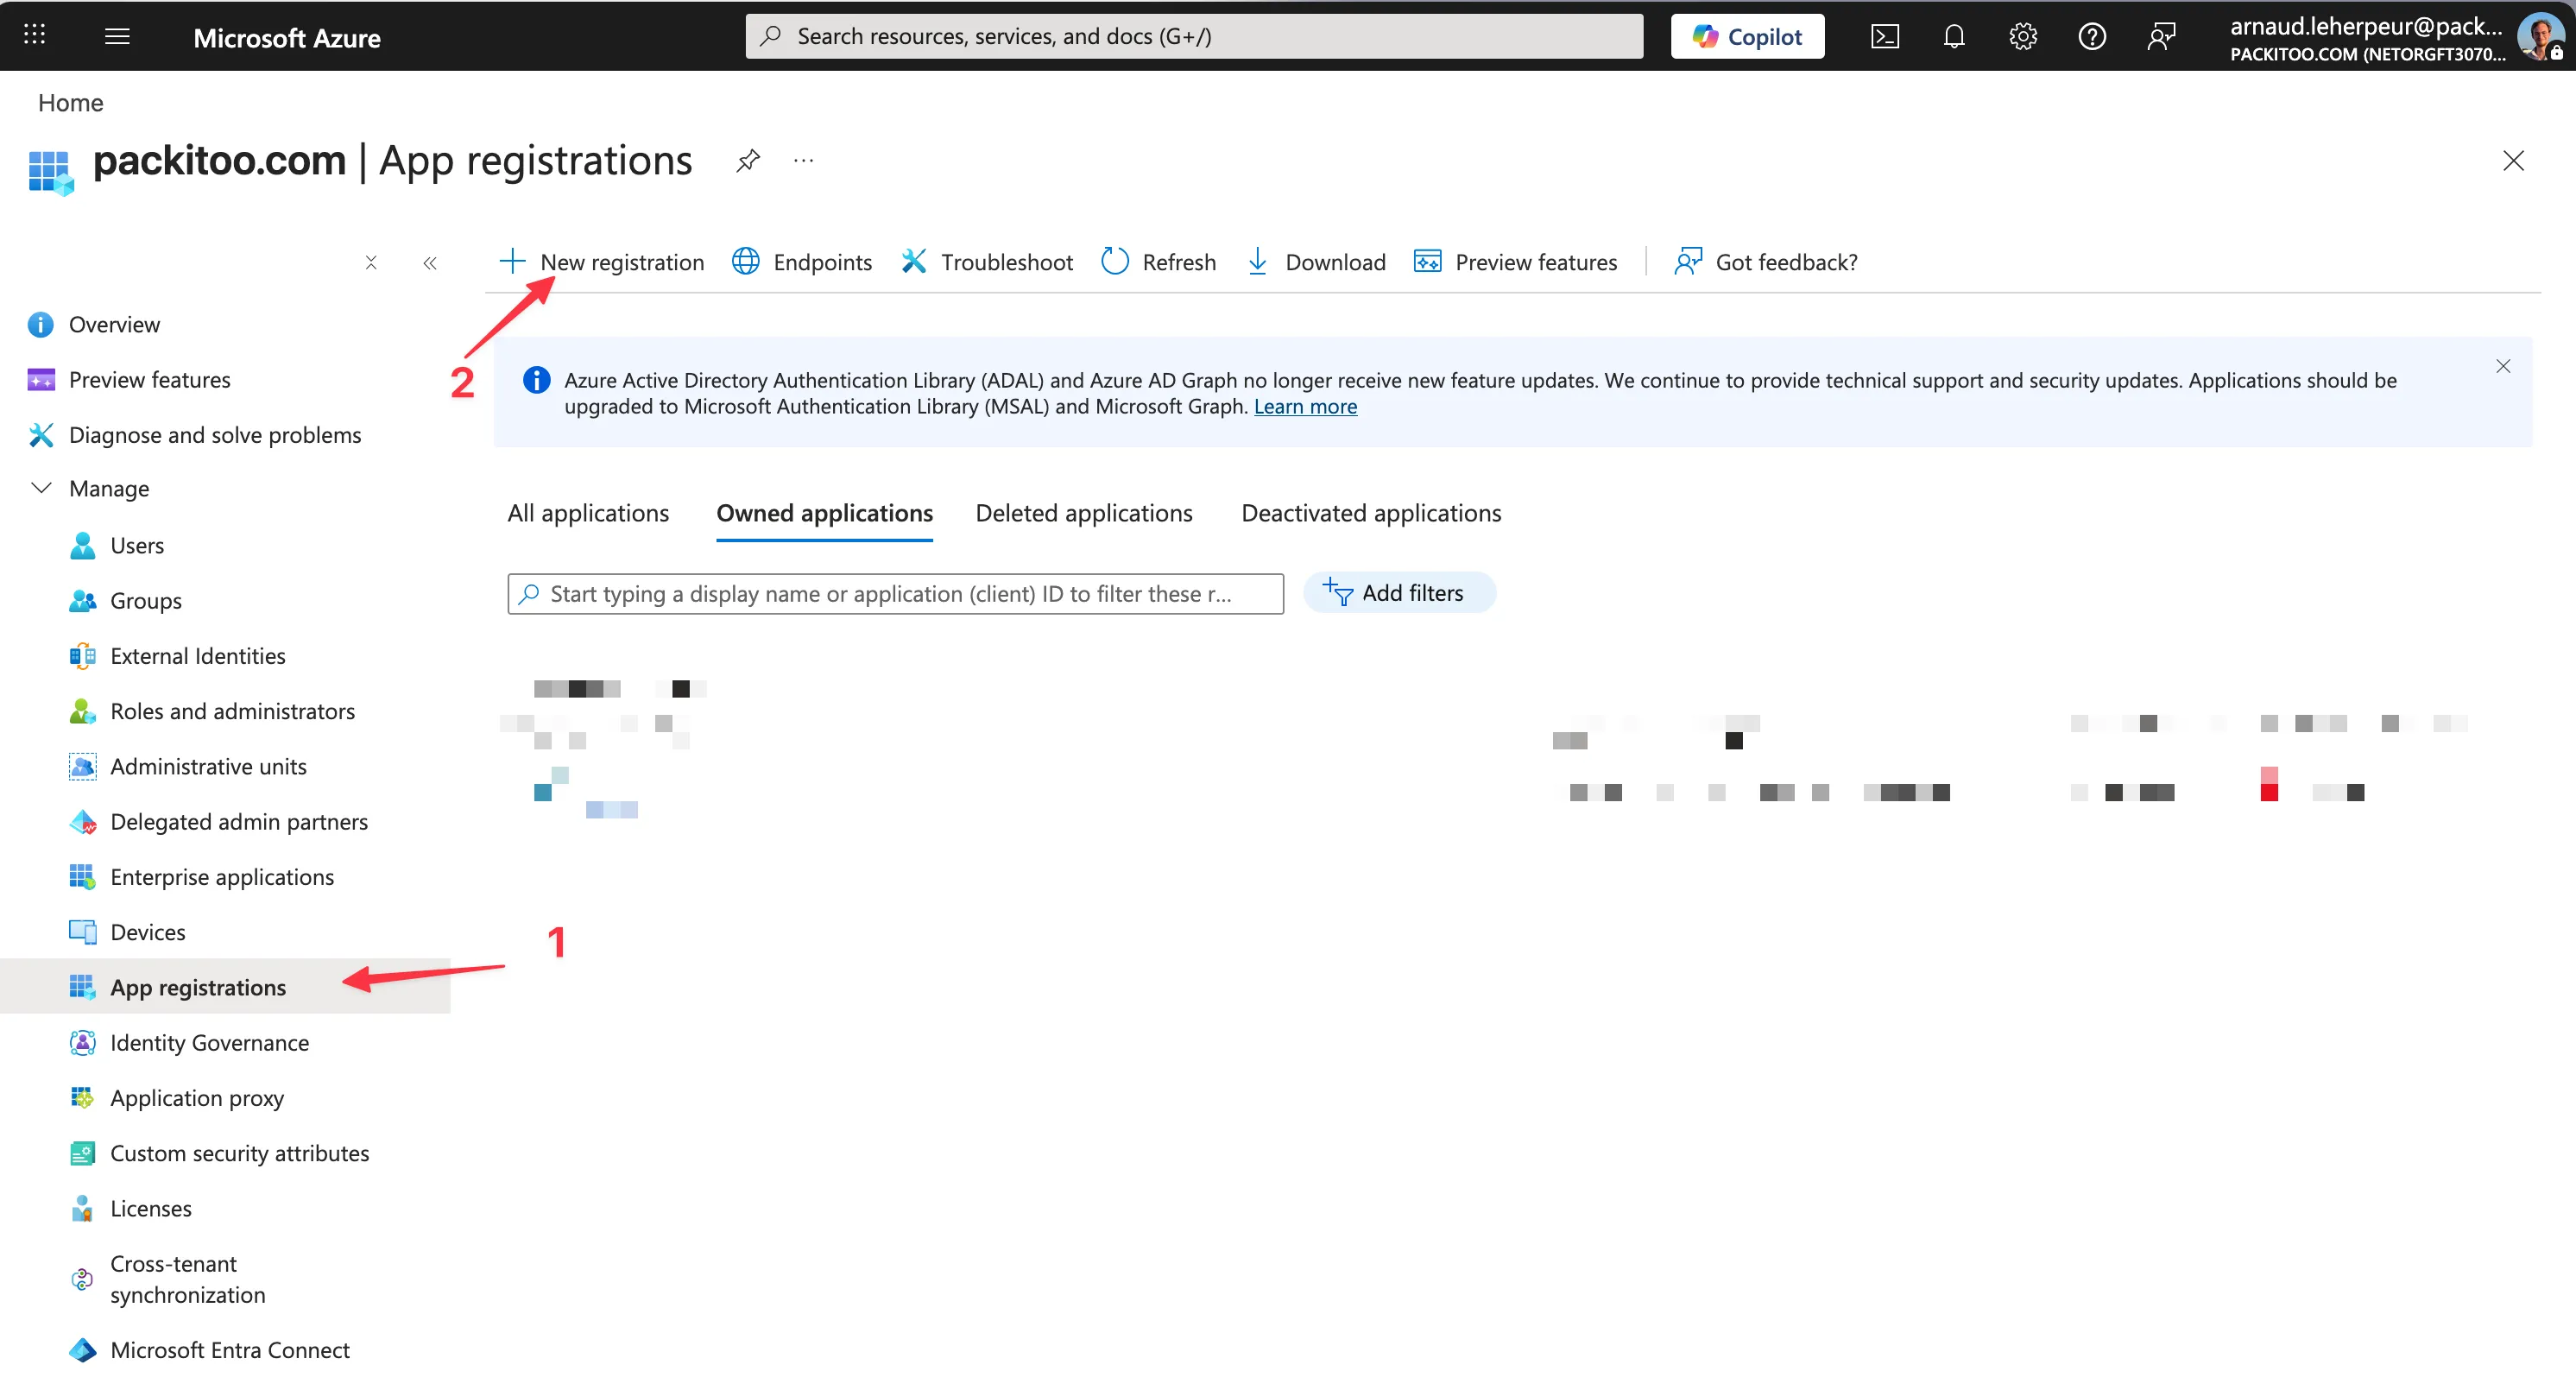
Section titled “1. Register an application in Azure AD”- Go to the Azure portal
- Navigate to Azure Active Directory > App registrations
- Click New registration
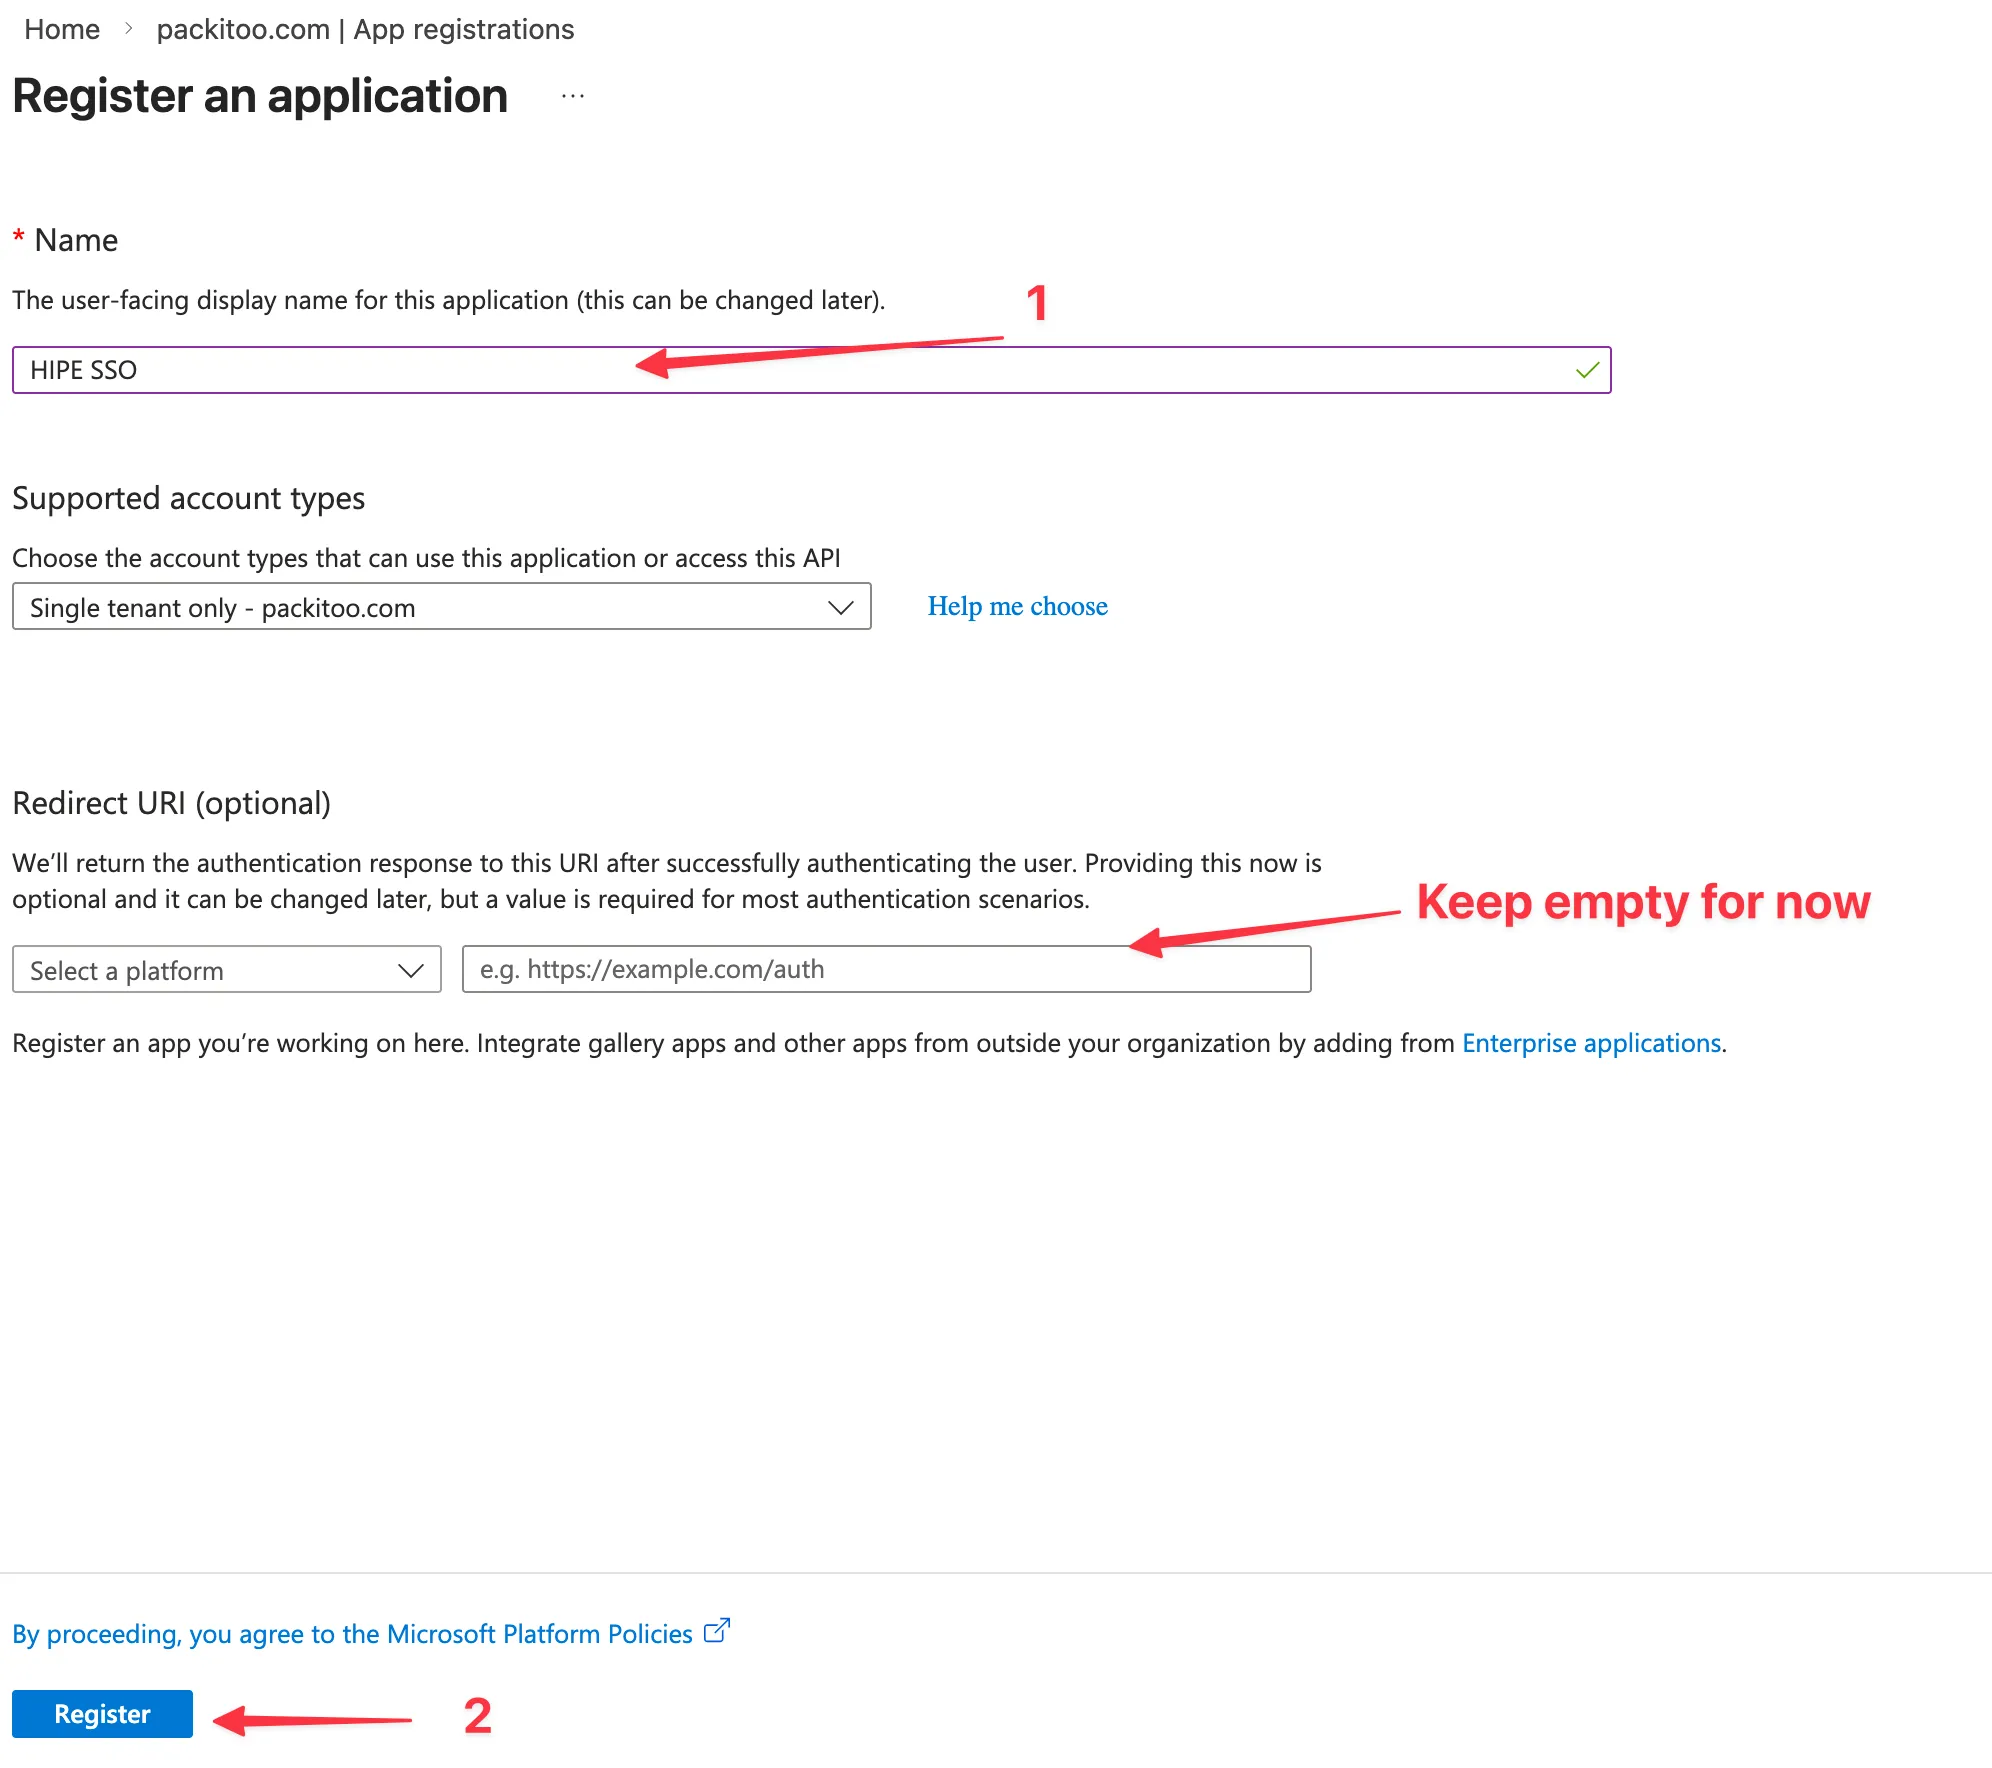
- Fill in the required fields:
- Name: Choose a name for your application (e.g.,
HIPE) that will be displayed in the Azure portal - Supported account types: Choose the appropriate option for your use case
- Redirect URI: Keep empty for now, we will configure it later
- Name: Choose a name for your application (e.g.,
- Click Register
2. Configure API permissions
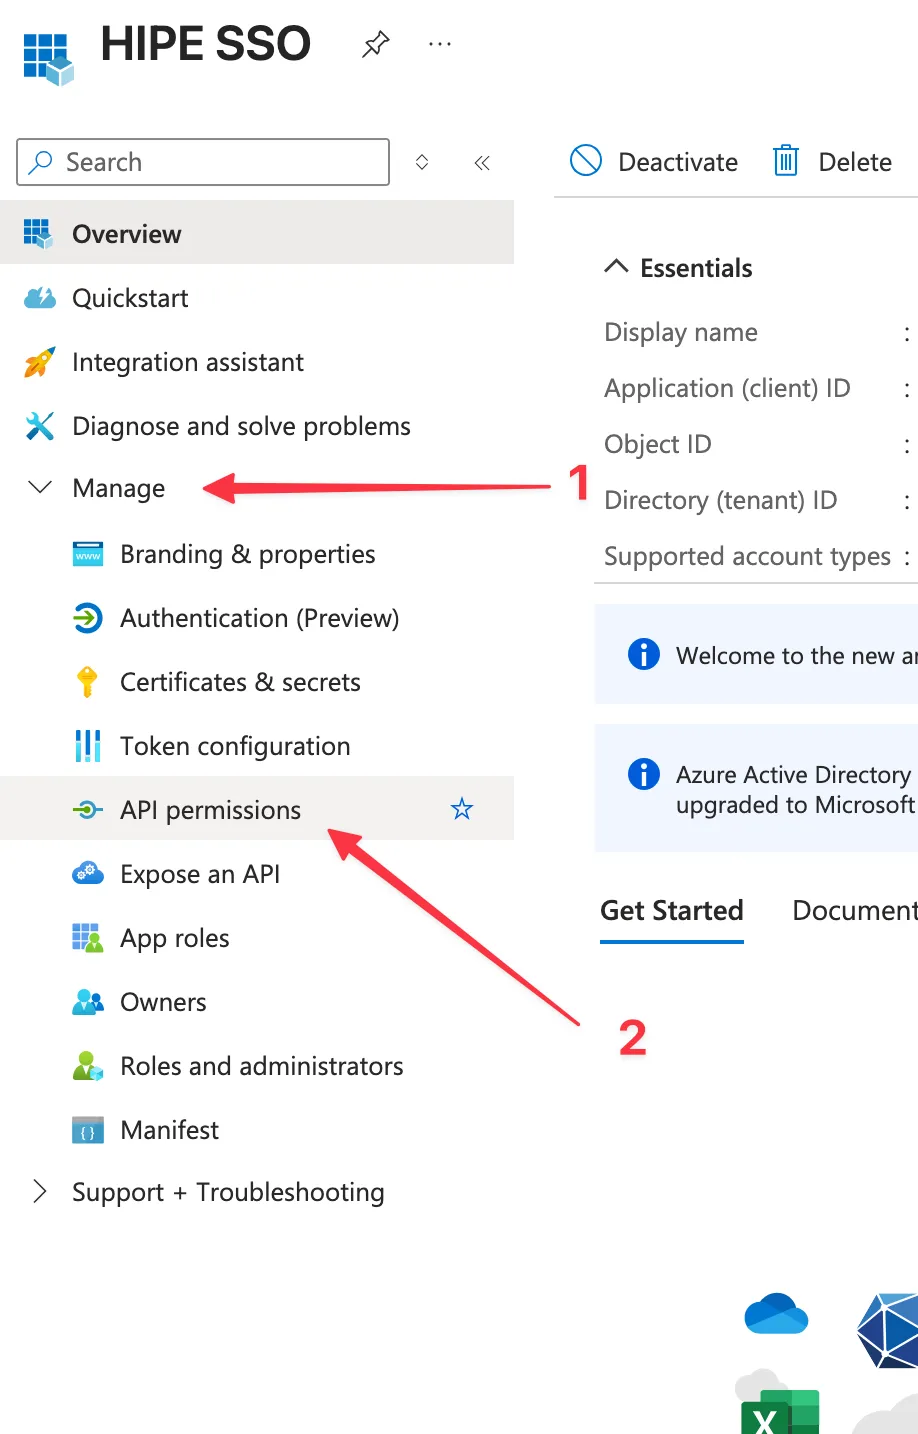
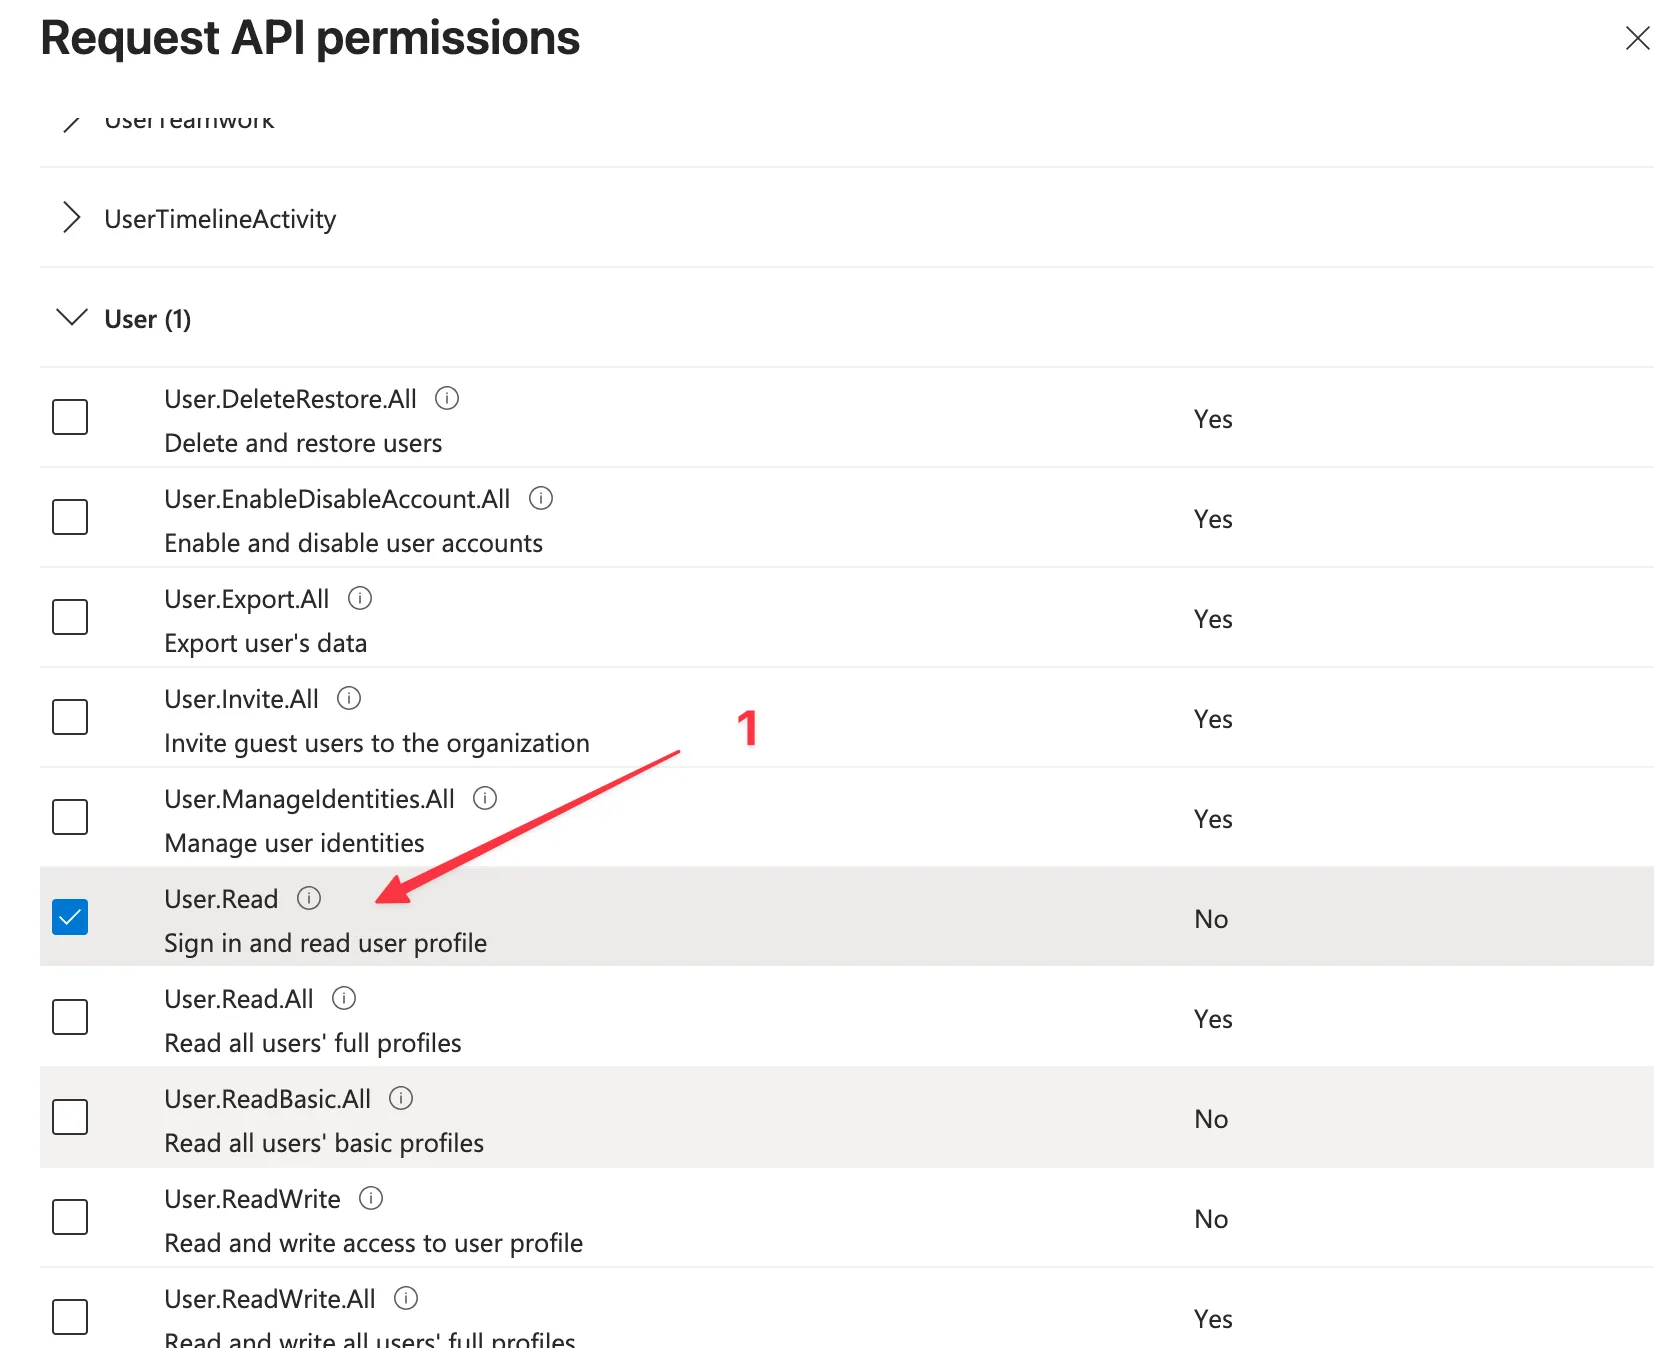
Section titled “2. Configure API permissions”- In the left navigation, click API permissions
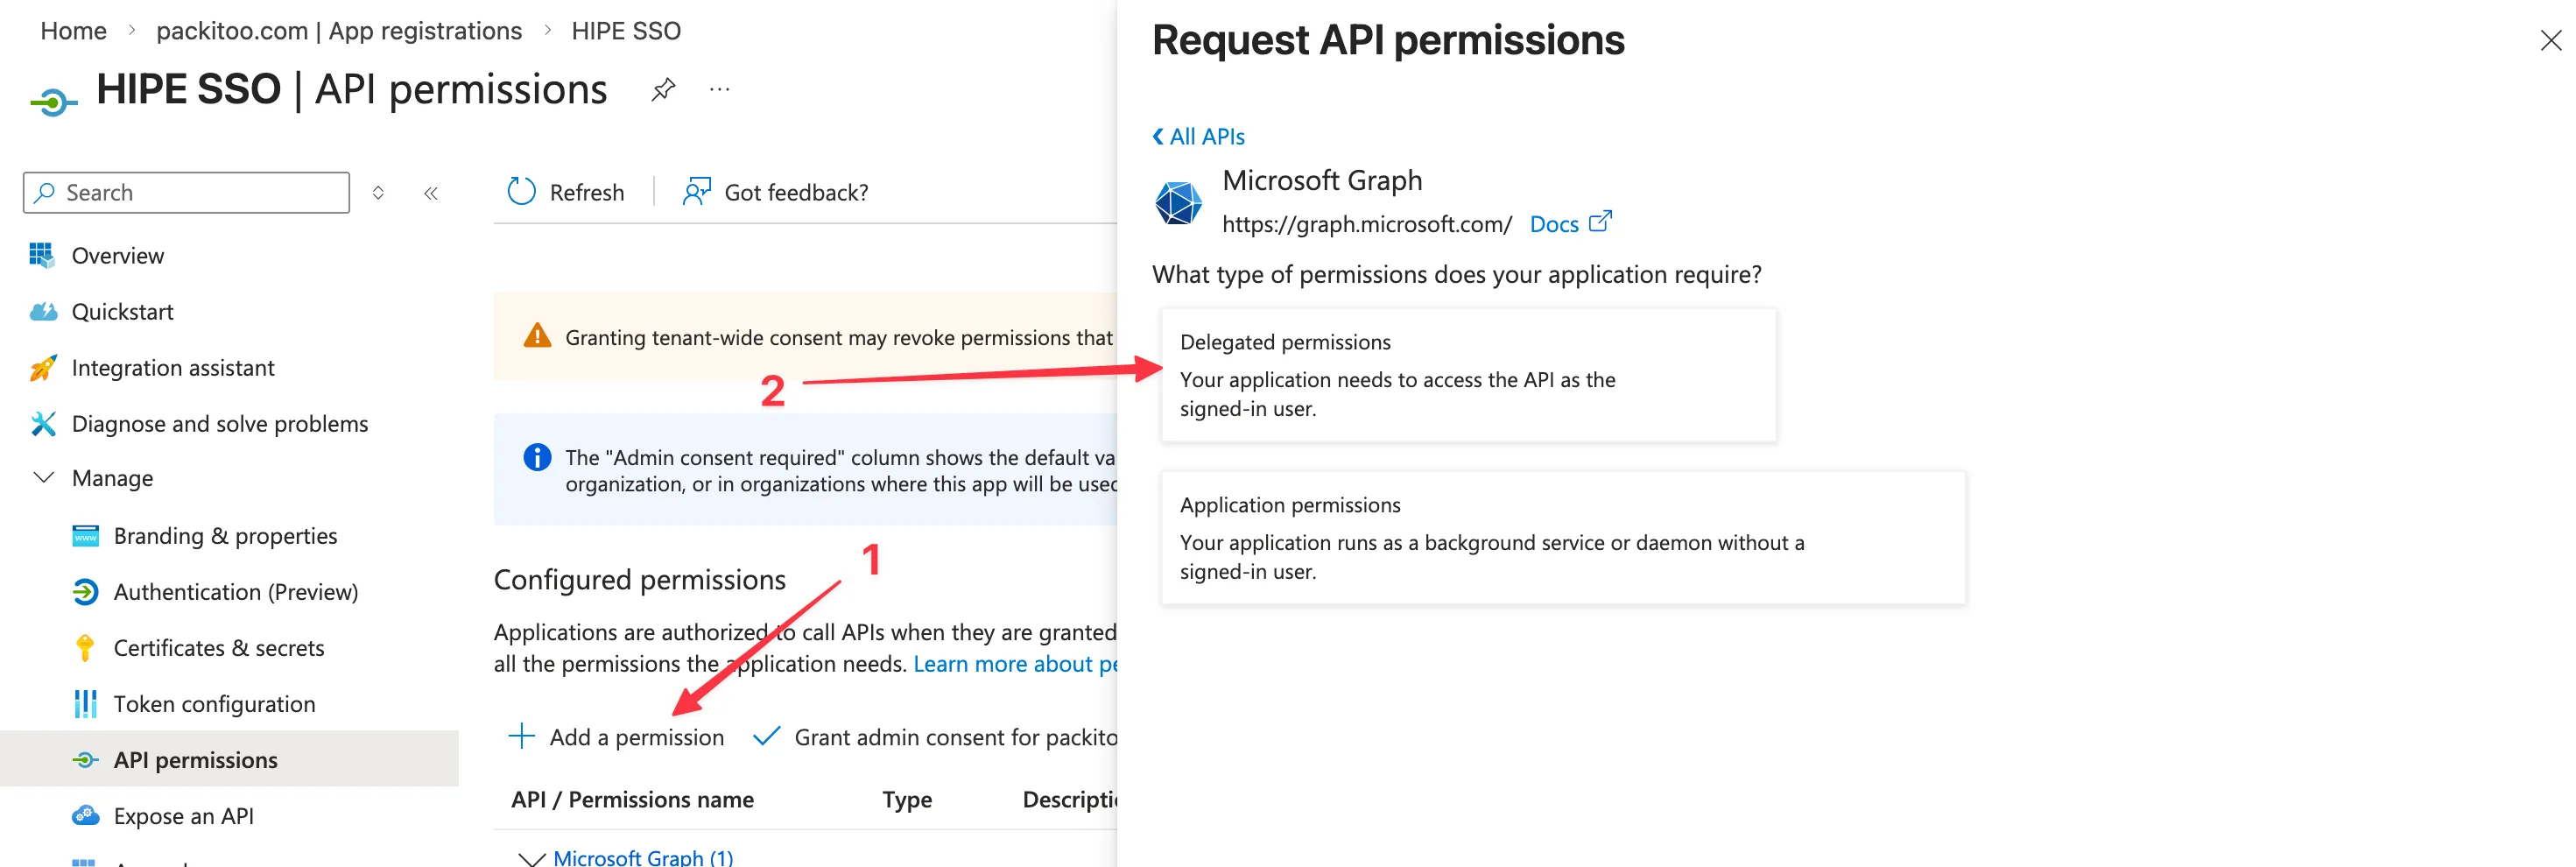
- Click Add a permission > Microsoft Graph
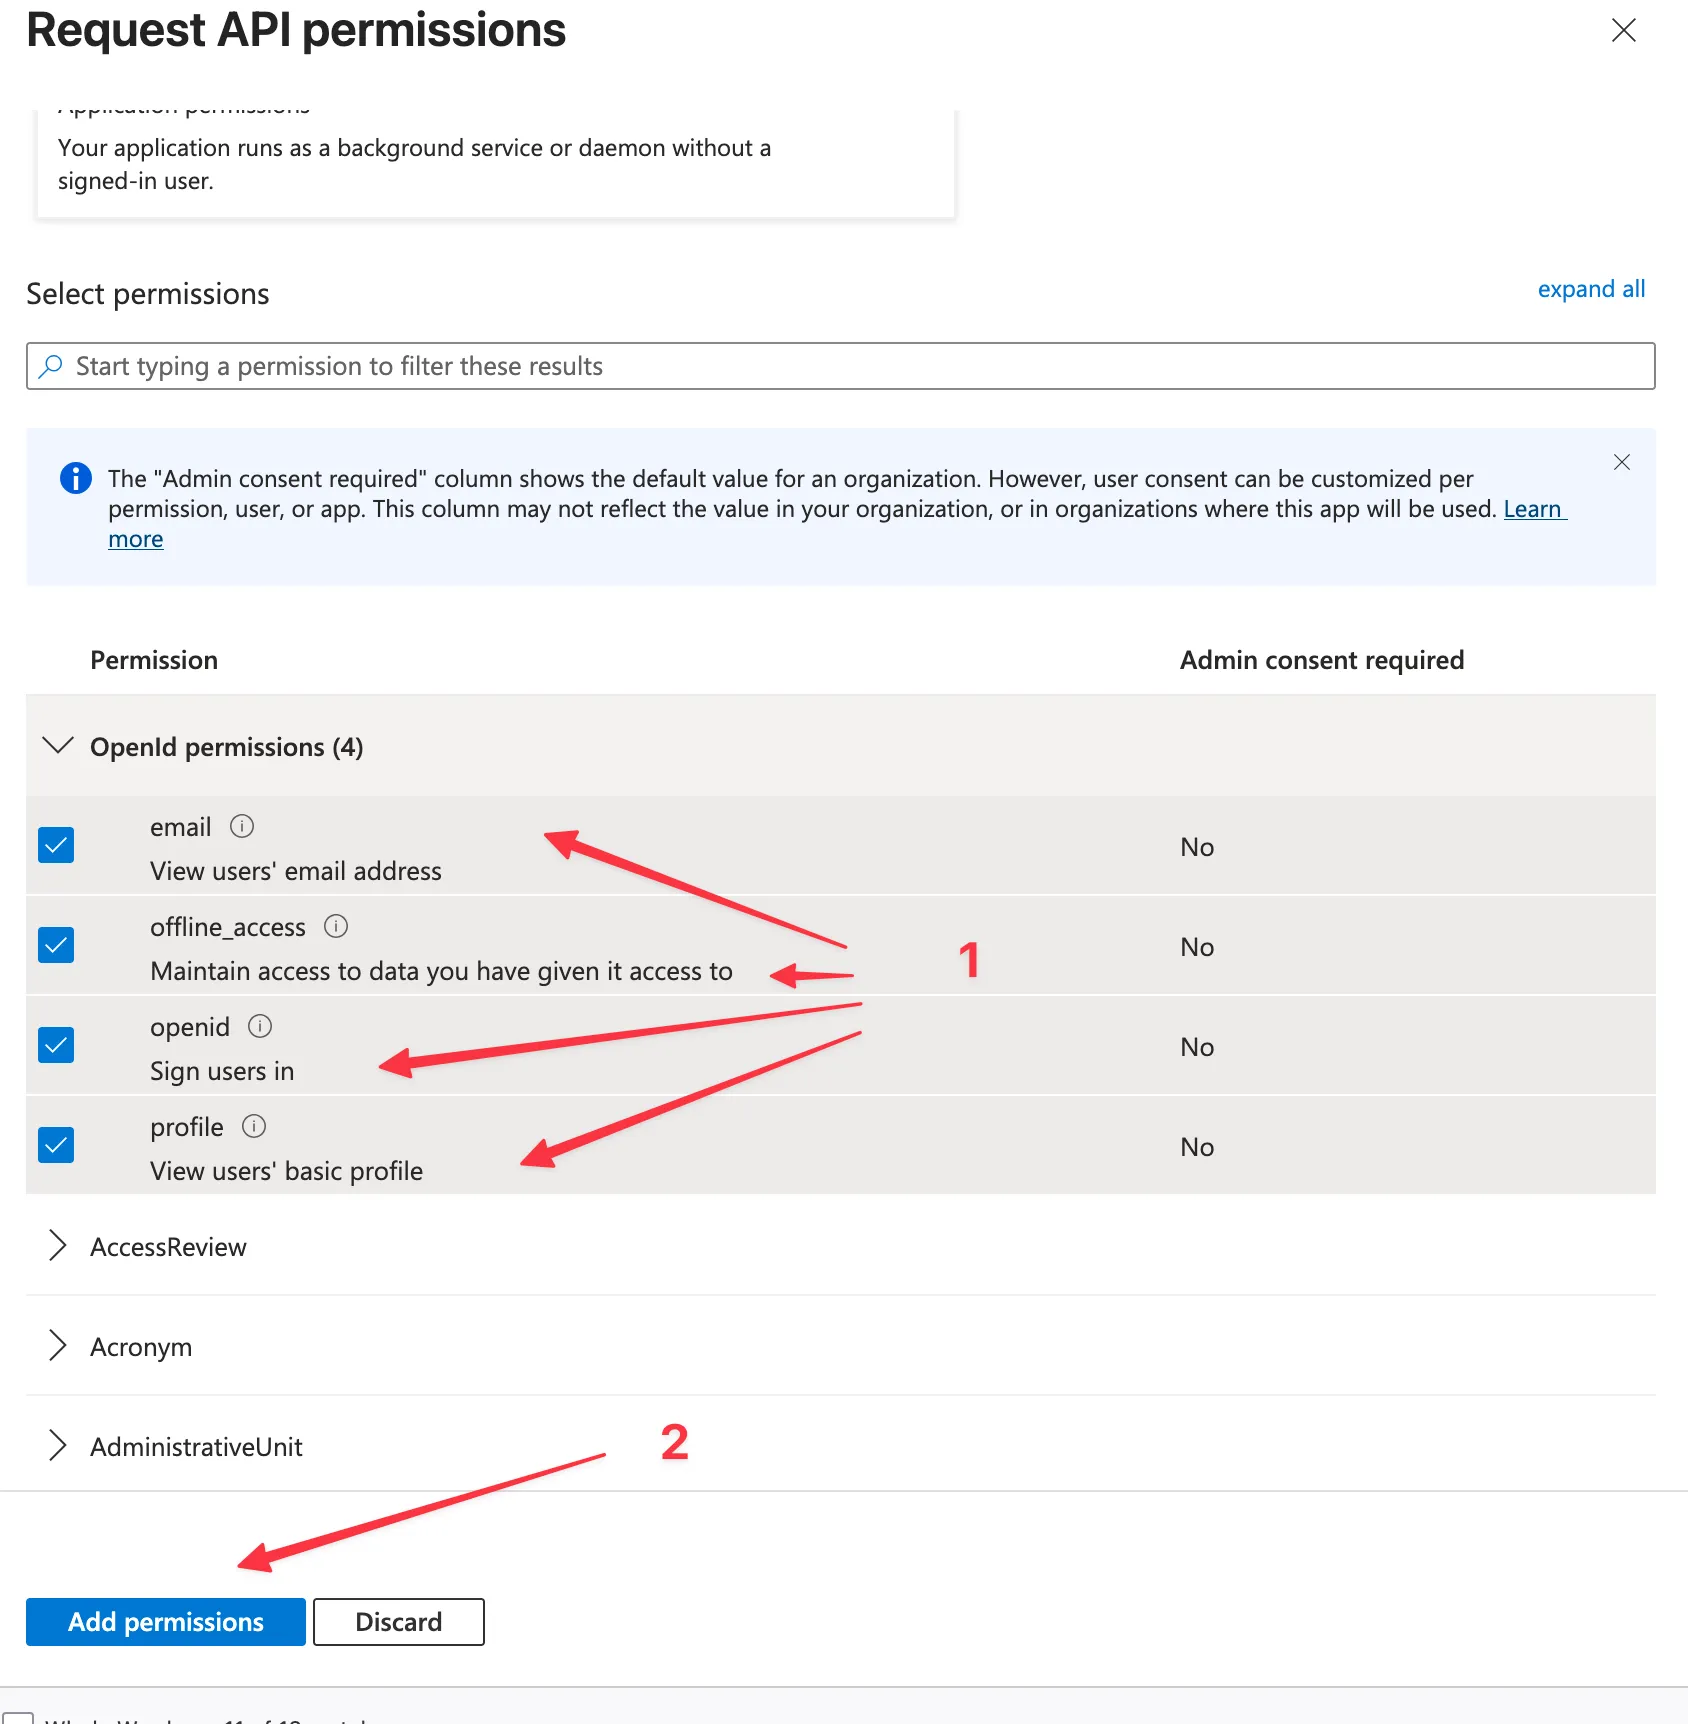
- Select Delegated permissions and add:
User.Reademailoffline_accessopenidprofile
- Click Add permissions
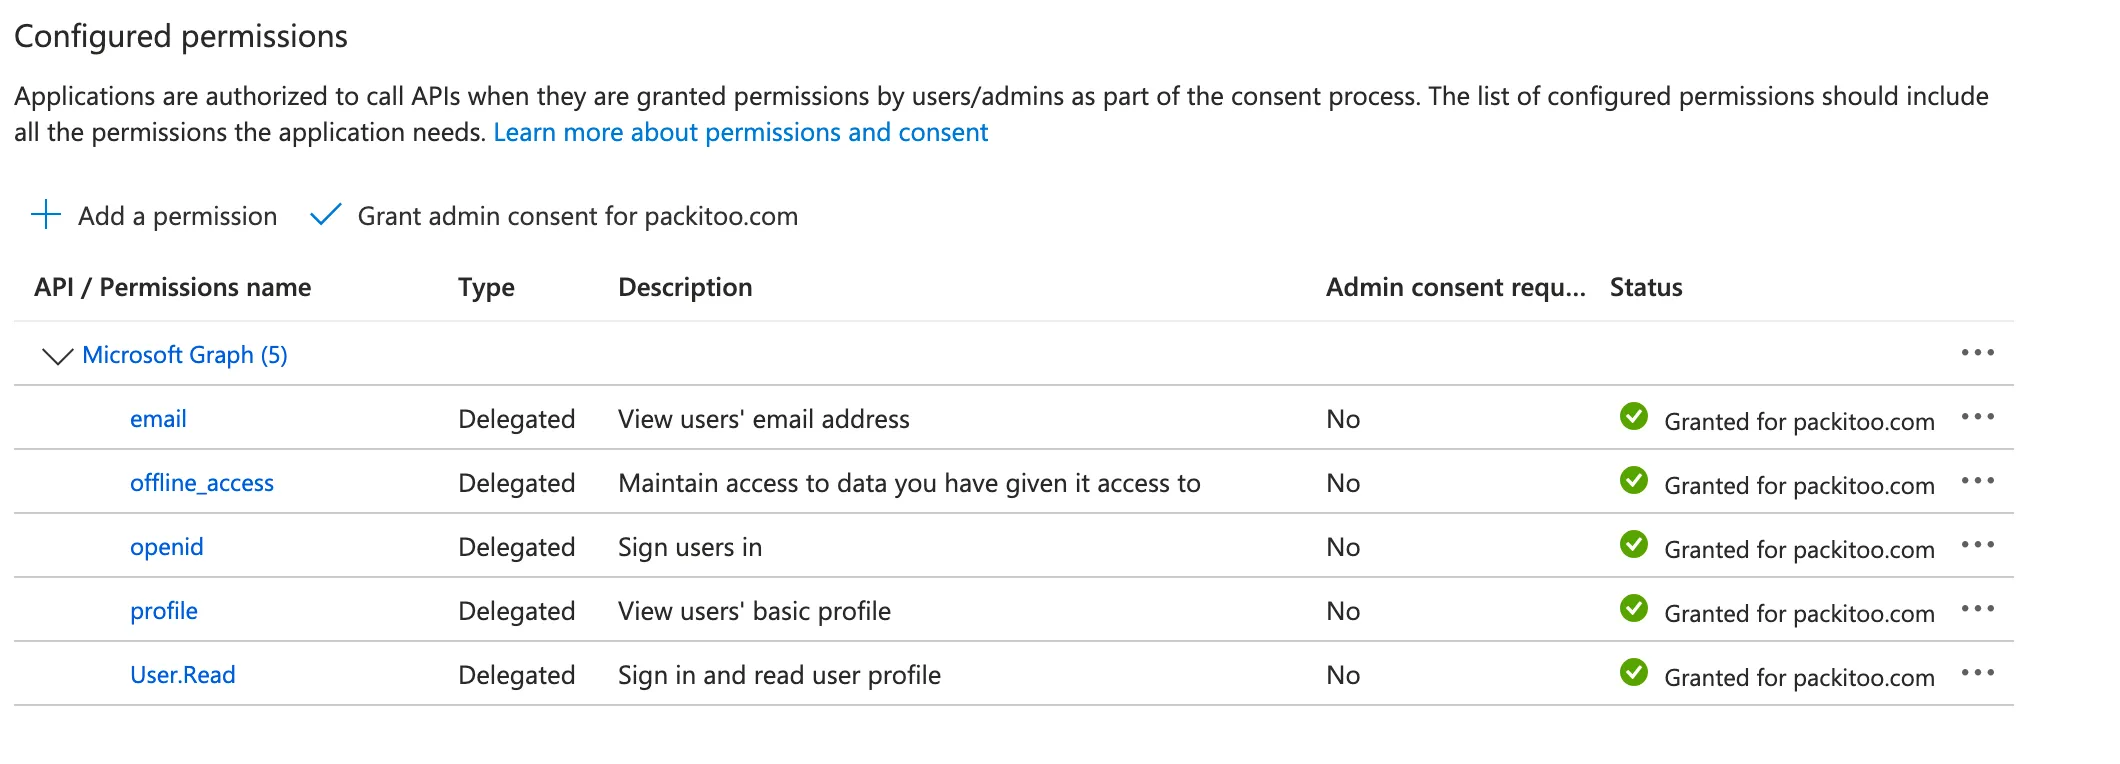
- Click Grant admin consent for [your tenant]
3. Configure authentication
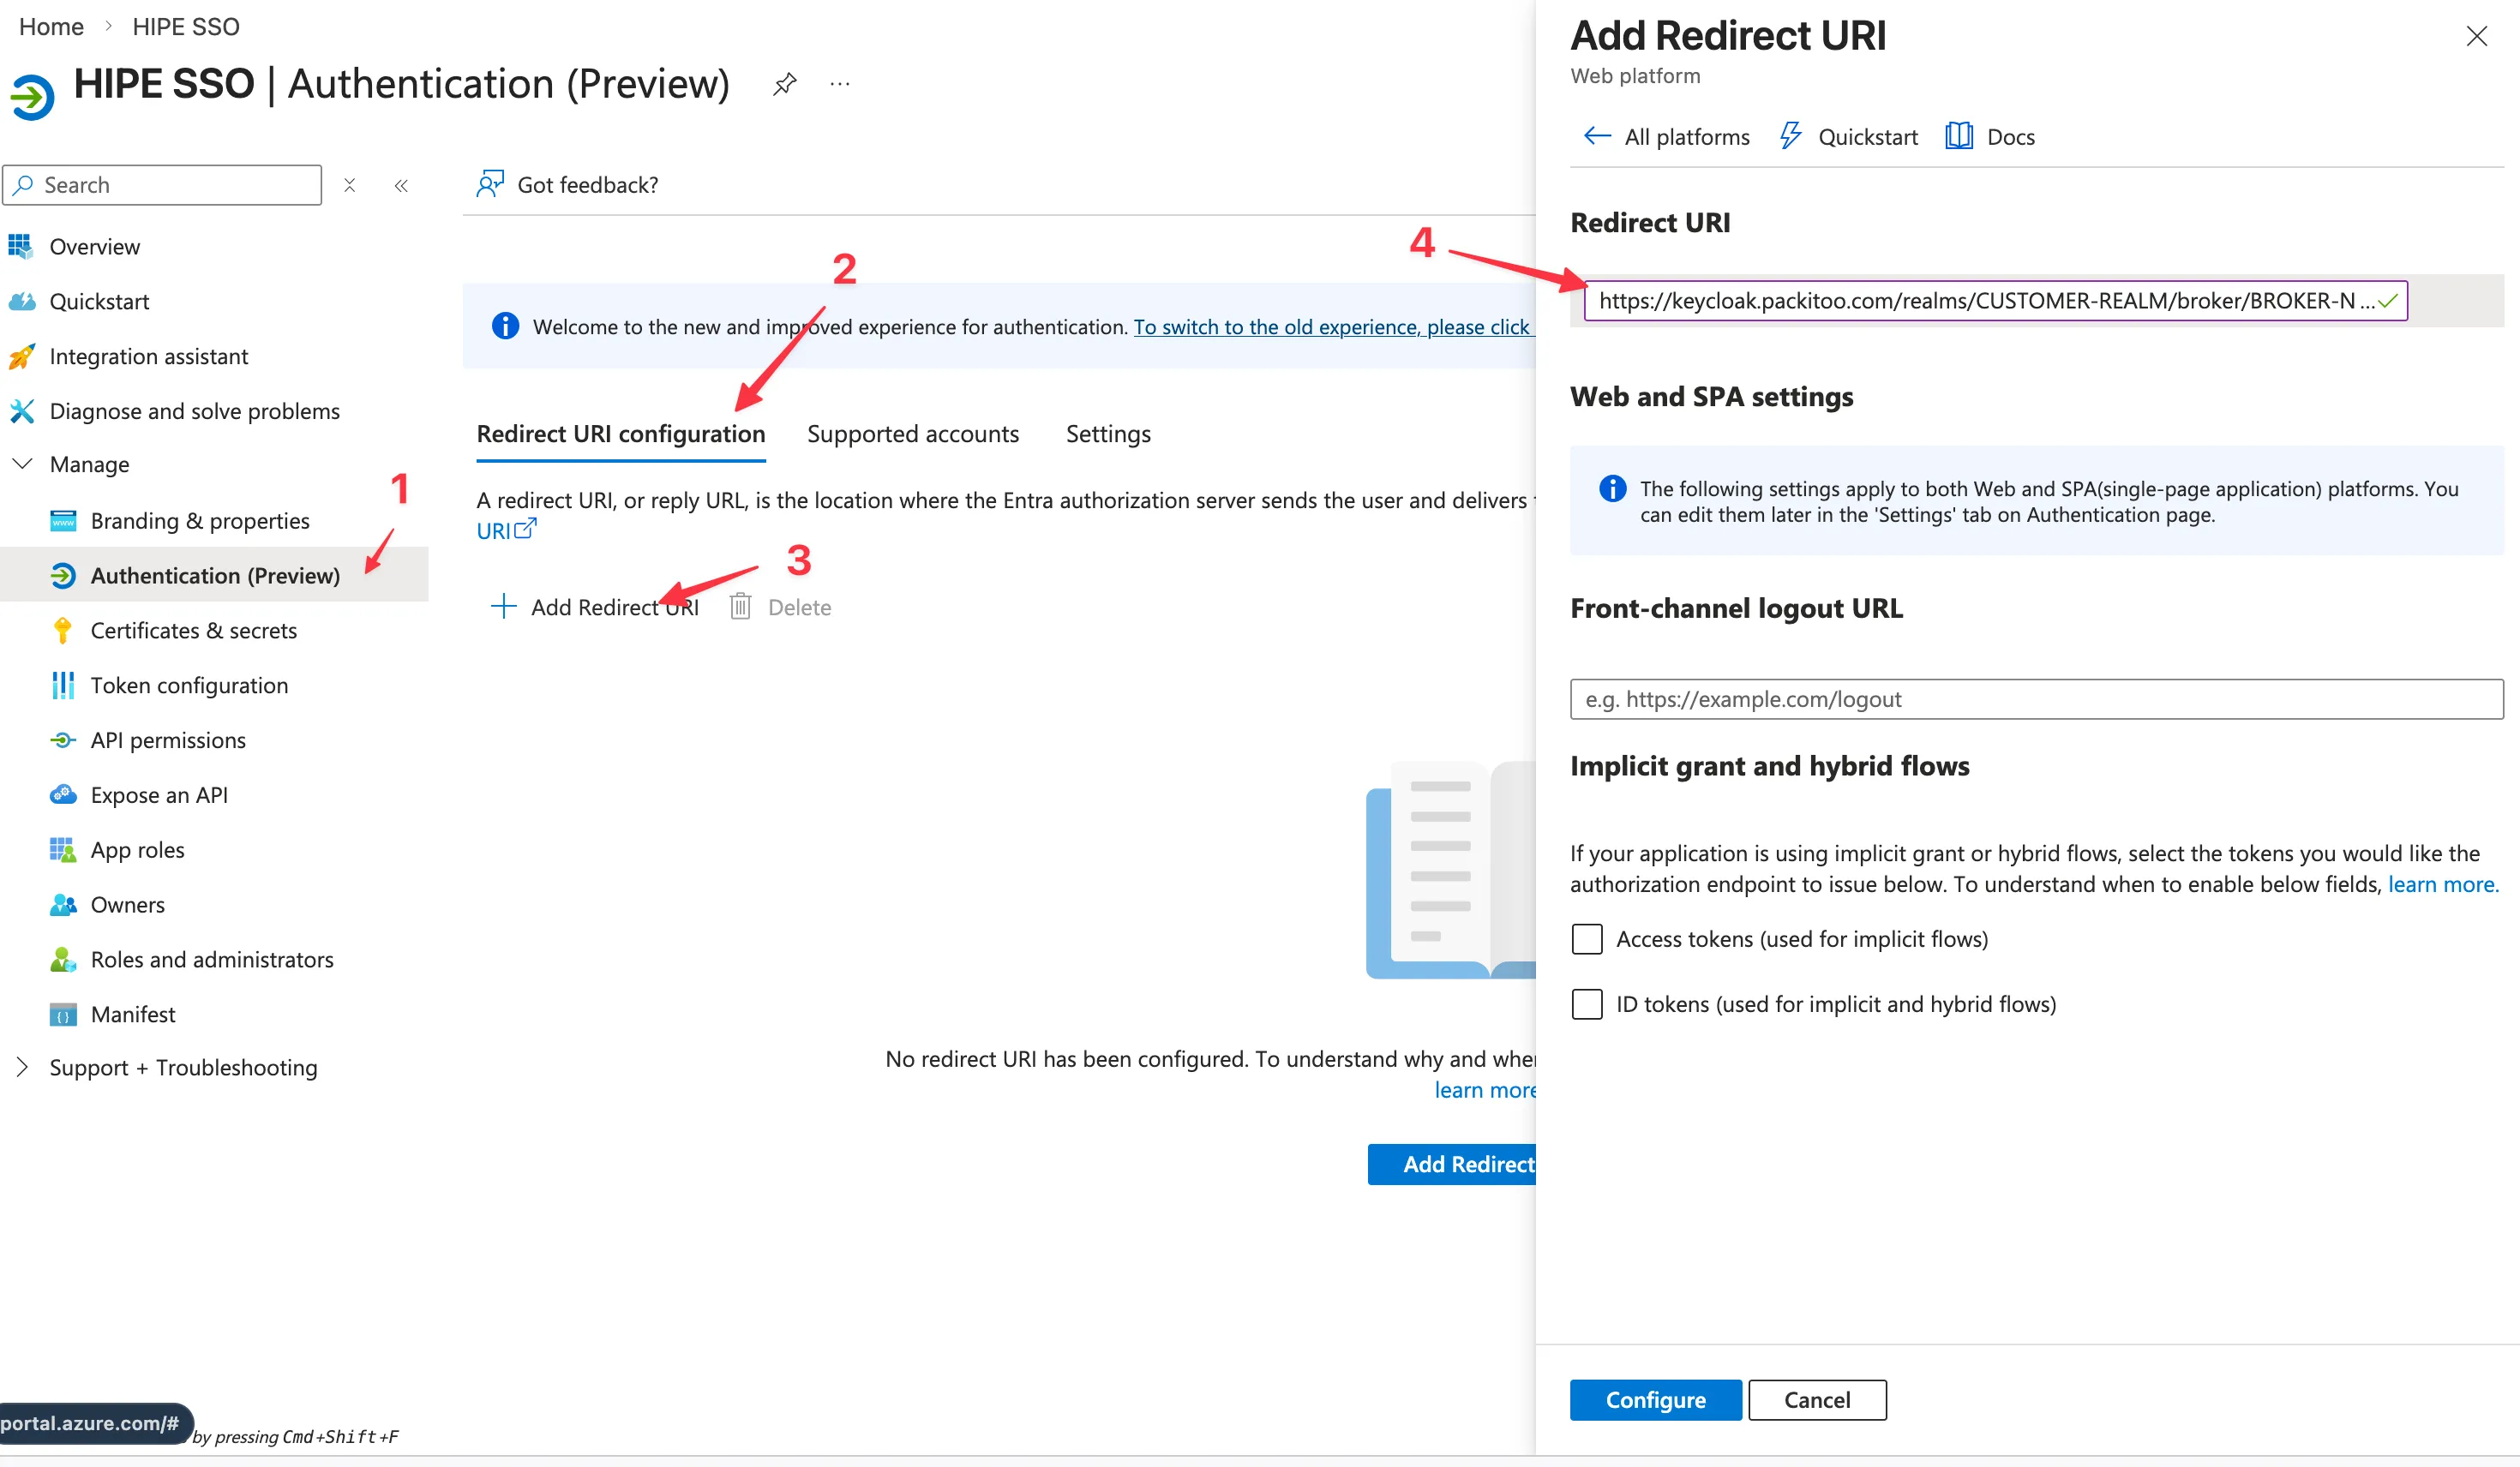
Section titled “3. Configure authentication”- In the left navigation, click Authentication
- Under Platform configurations, click Add a platform
- Select Web
- Add the redirect URI:
https://keycloak.packitoo.com/realms/REALM_NAME/broker/azure-ad-oidc/endpoint(This URL will be given to you by your Customer Success Manager) - Click Configure
4. Configure token configuration
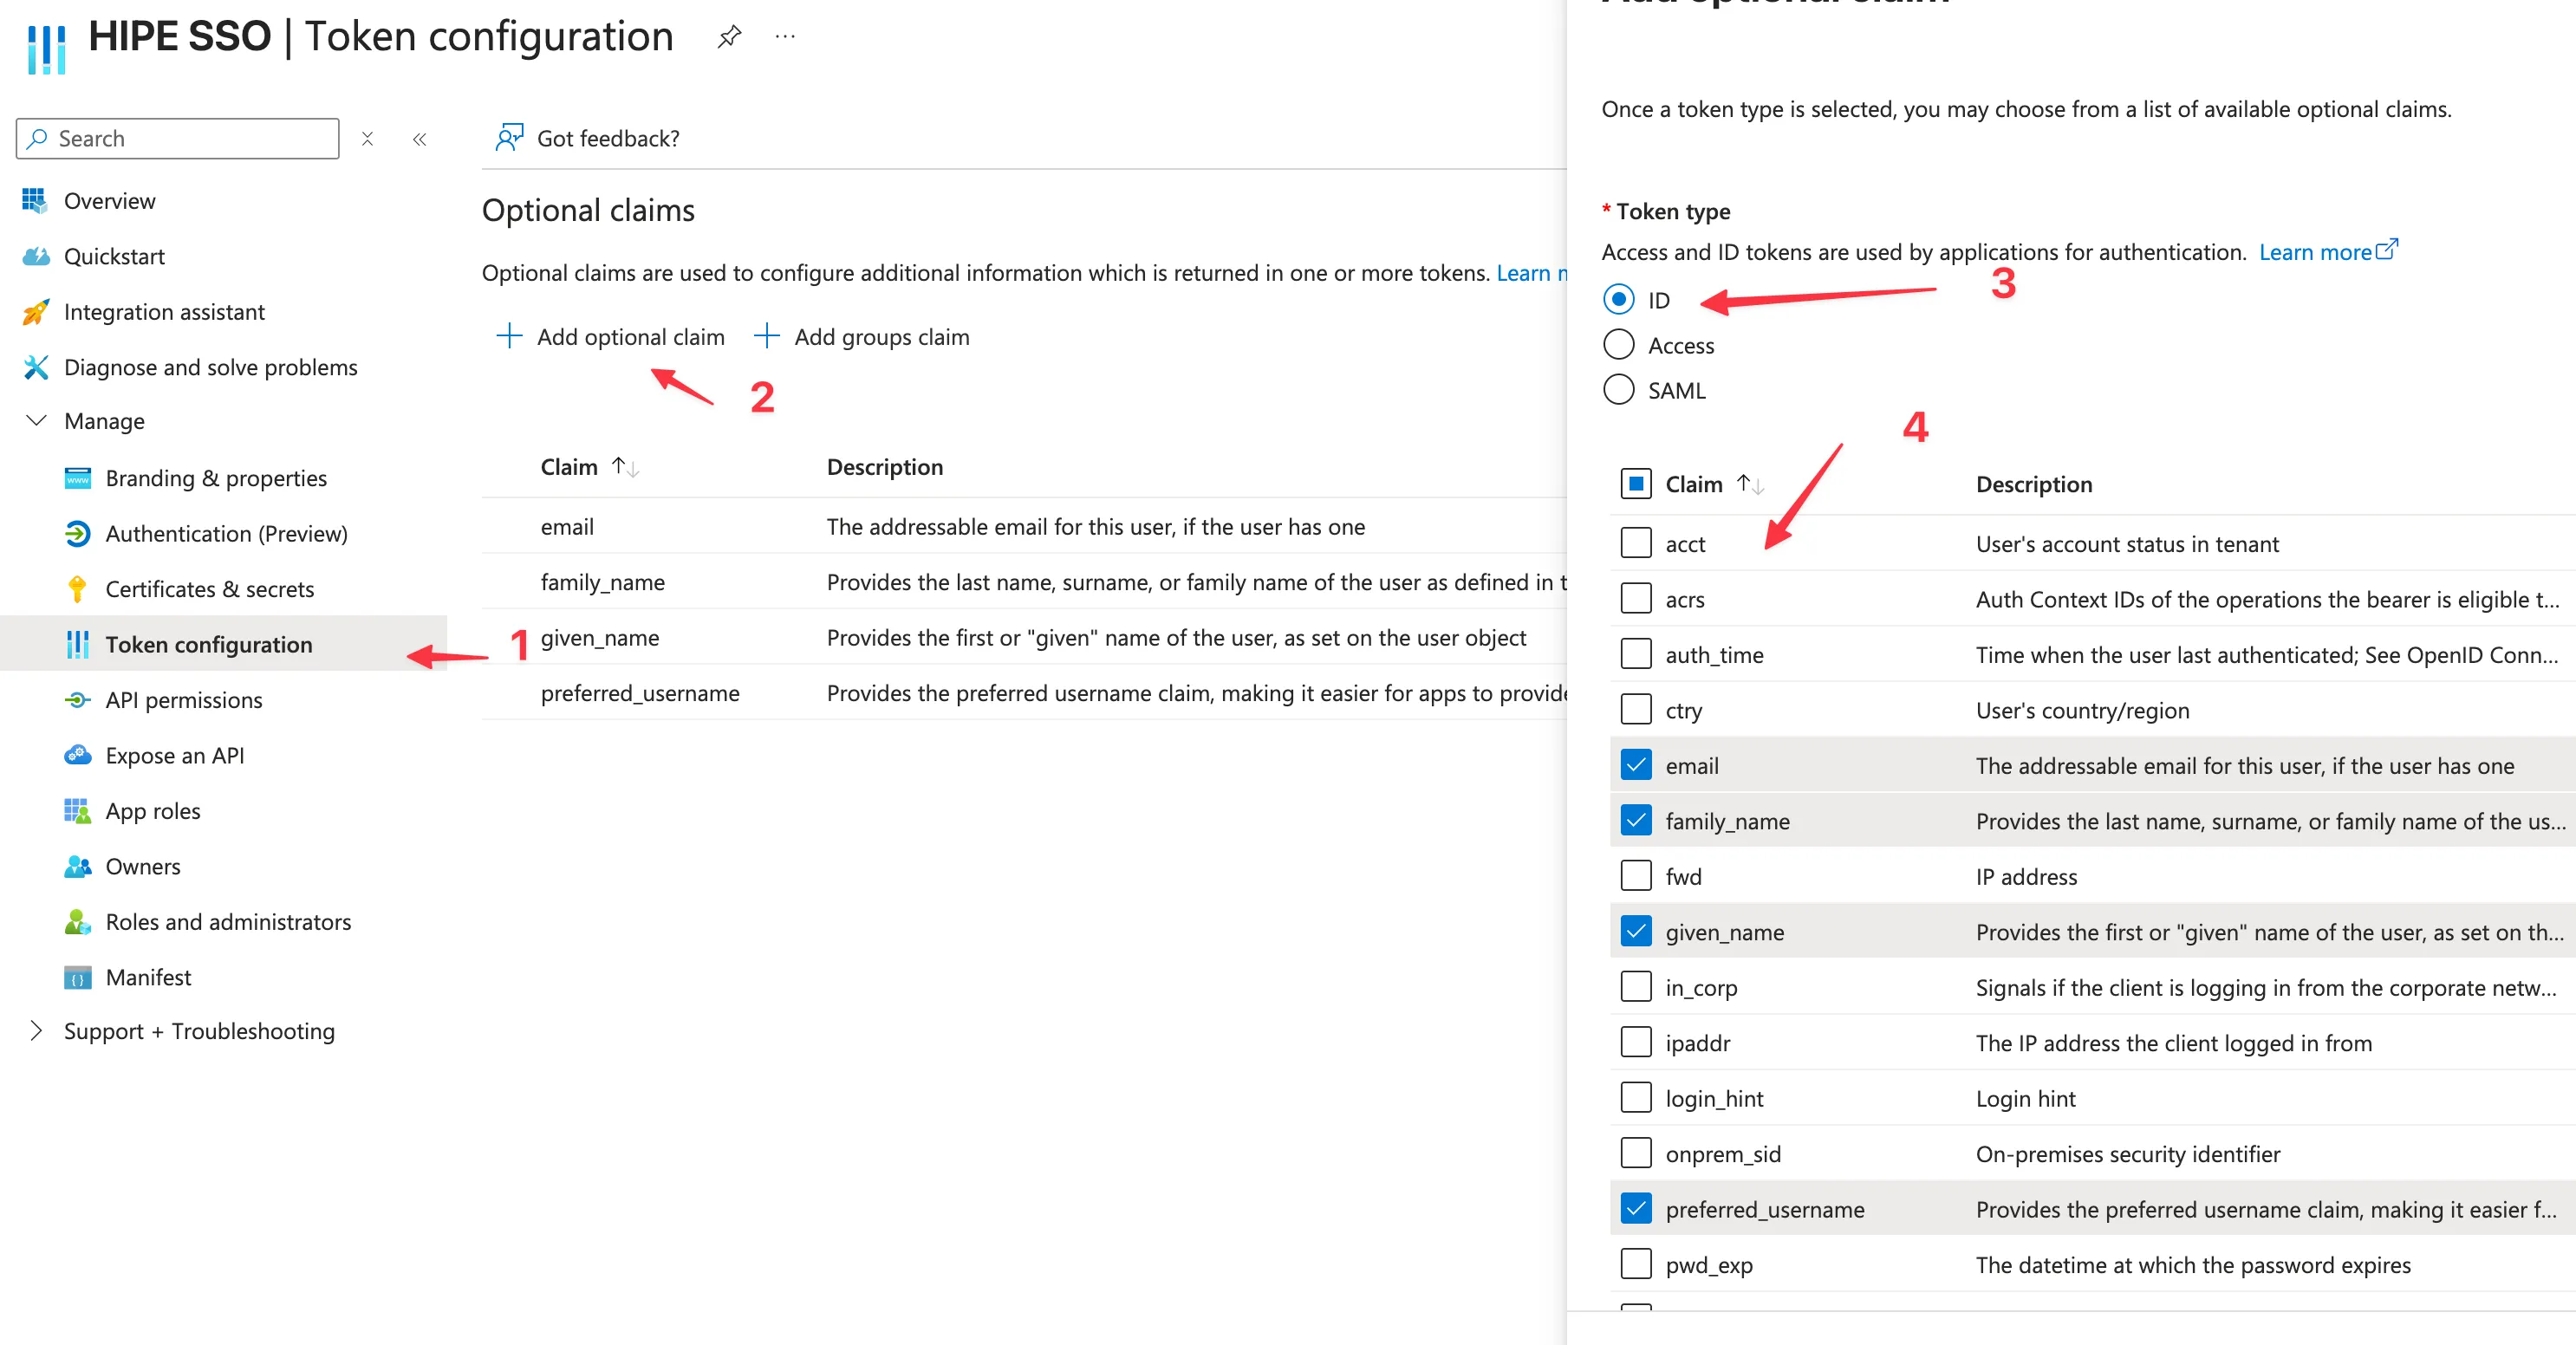
Section titled “4. Configure token configuration”- In the left navigation, click Token configuration
- Click Add optional claim
- Add claims as needed (Select ID token in the radio button)
emailfamily_namegiven_namepreferred_username
5. Get credentials
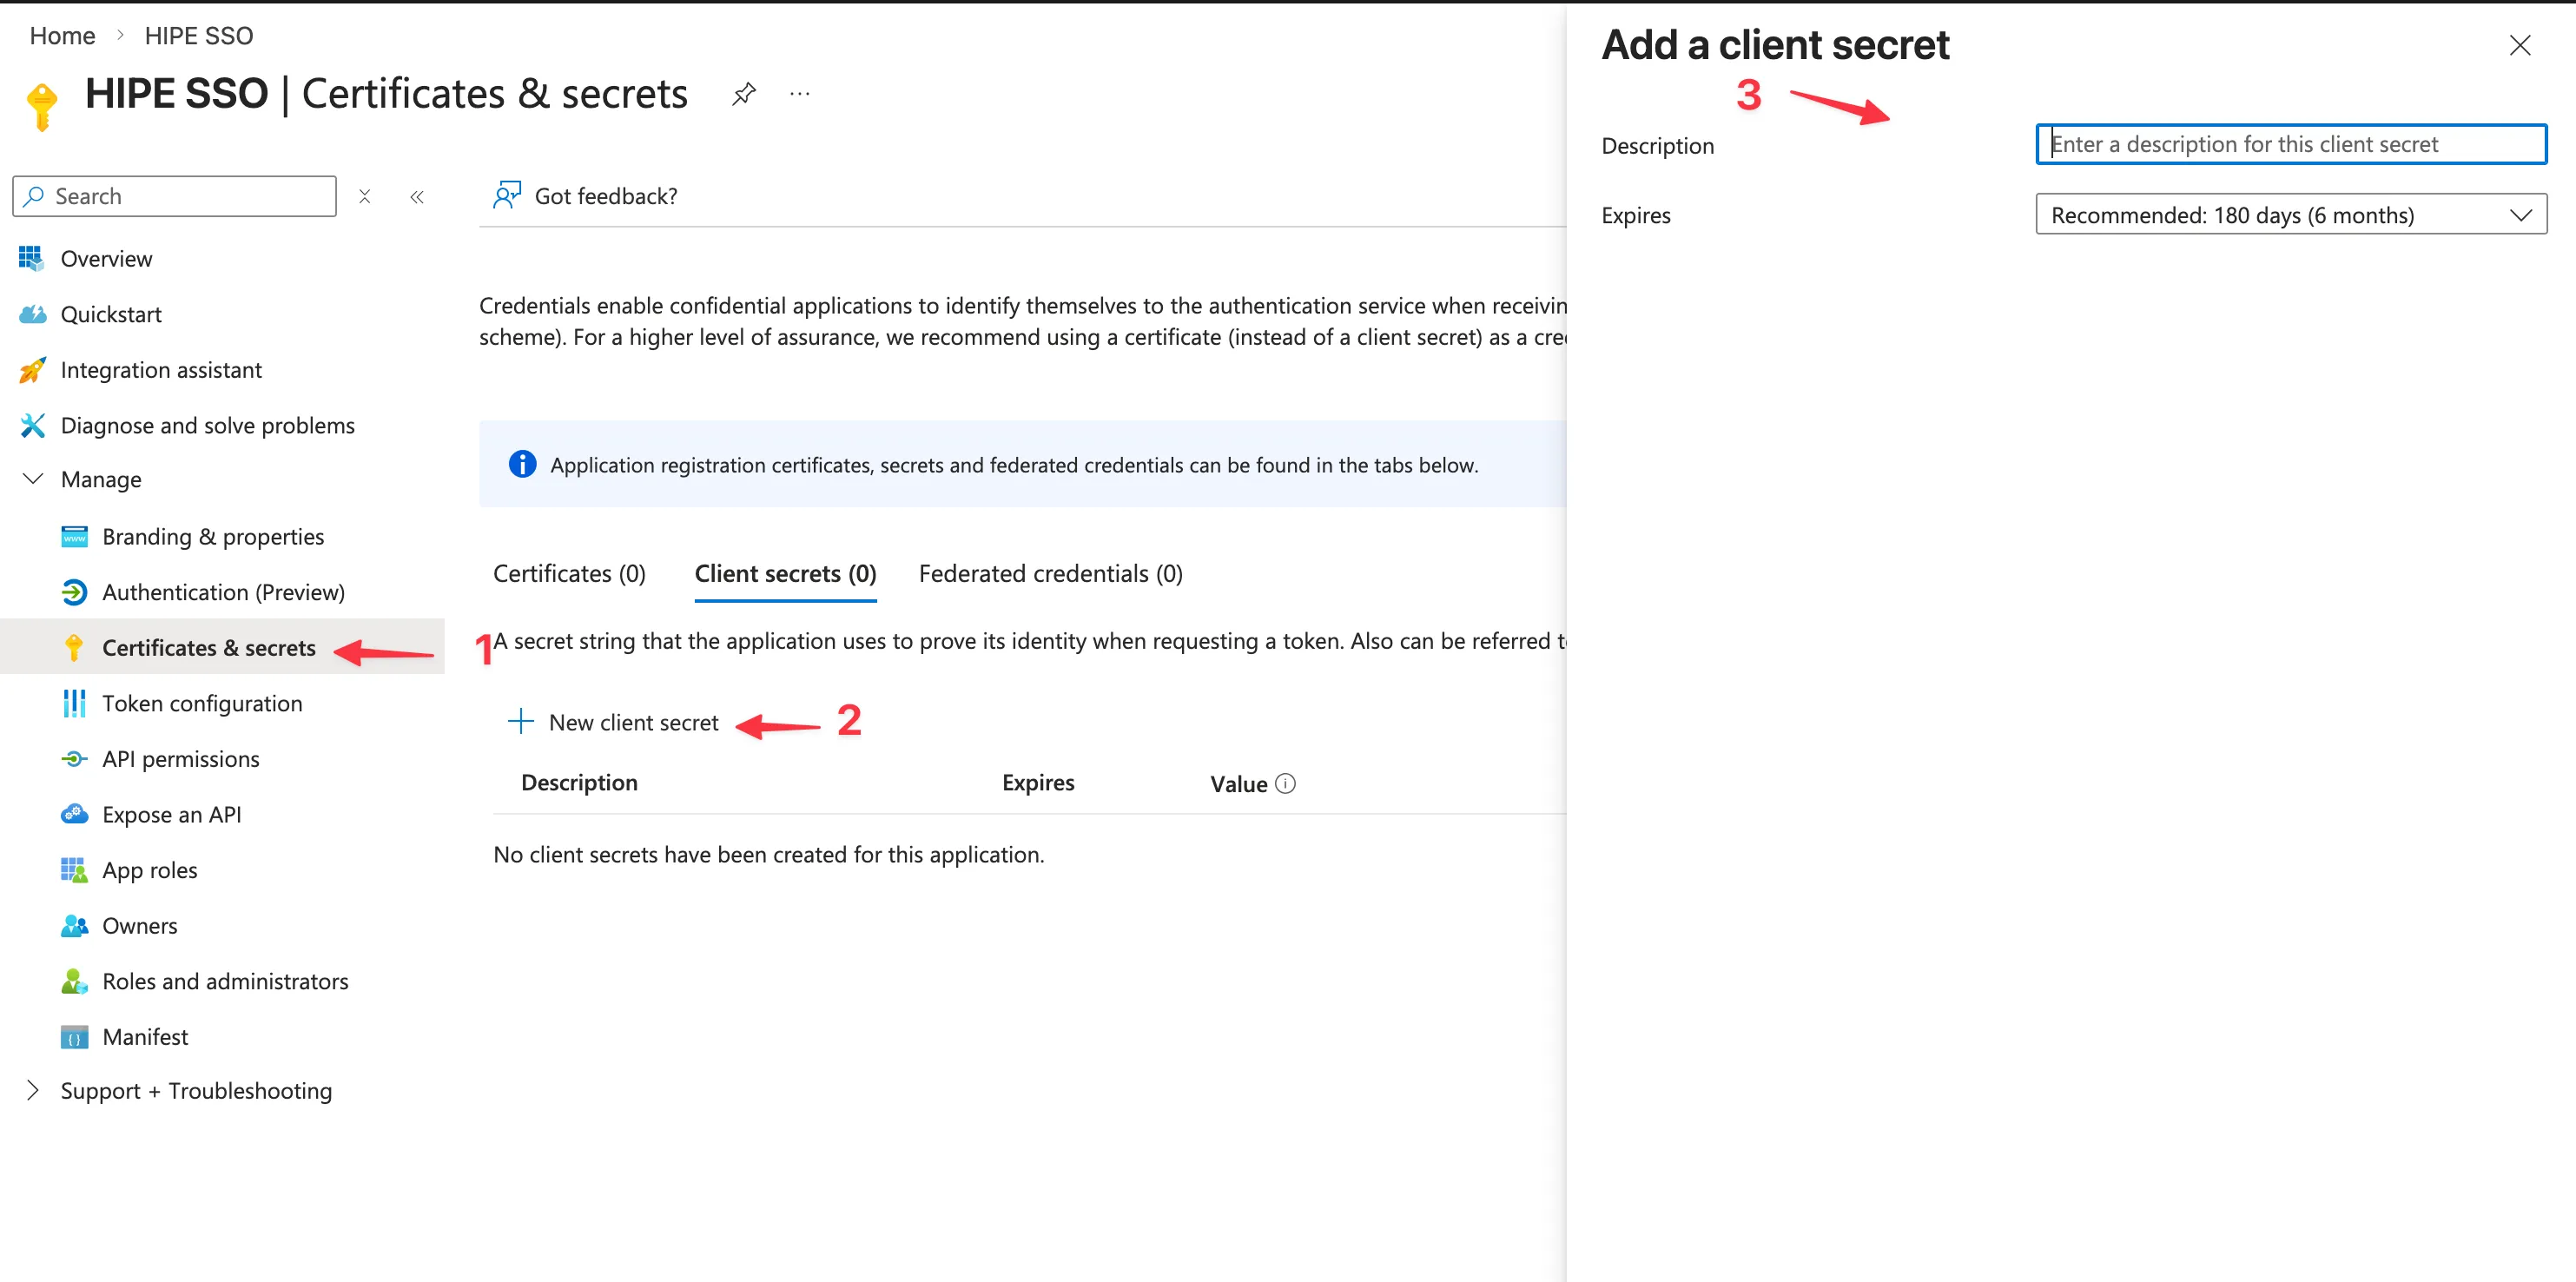
Section titled “5. Get credentials”- In the left navigation, click Certificates & secrets
- Under Client secrets, click New client secret
- Add a description and expiration
- Description:
HIPE SSO - Expiration:
24 months(Except if you want shorter expiration for it but consider that you will need to rotate the secret)
- Description:
- Click Add
- Copy the secret value (you won’t be able to see it again) and save it for later
6. Create discovery endpoint
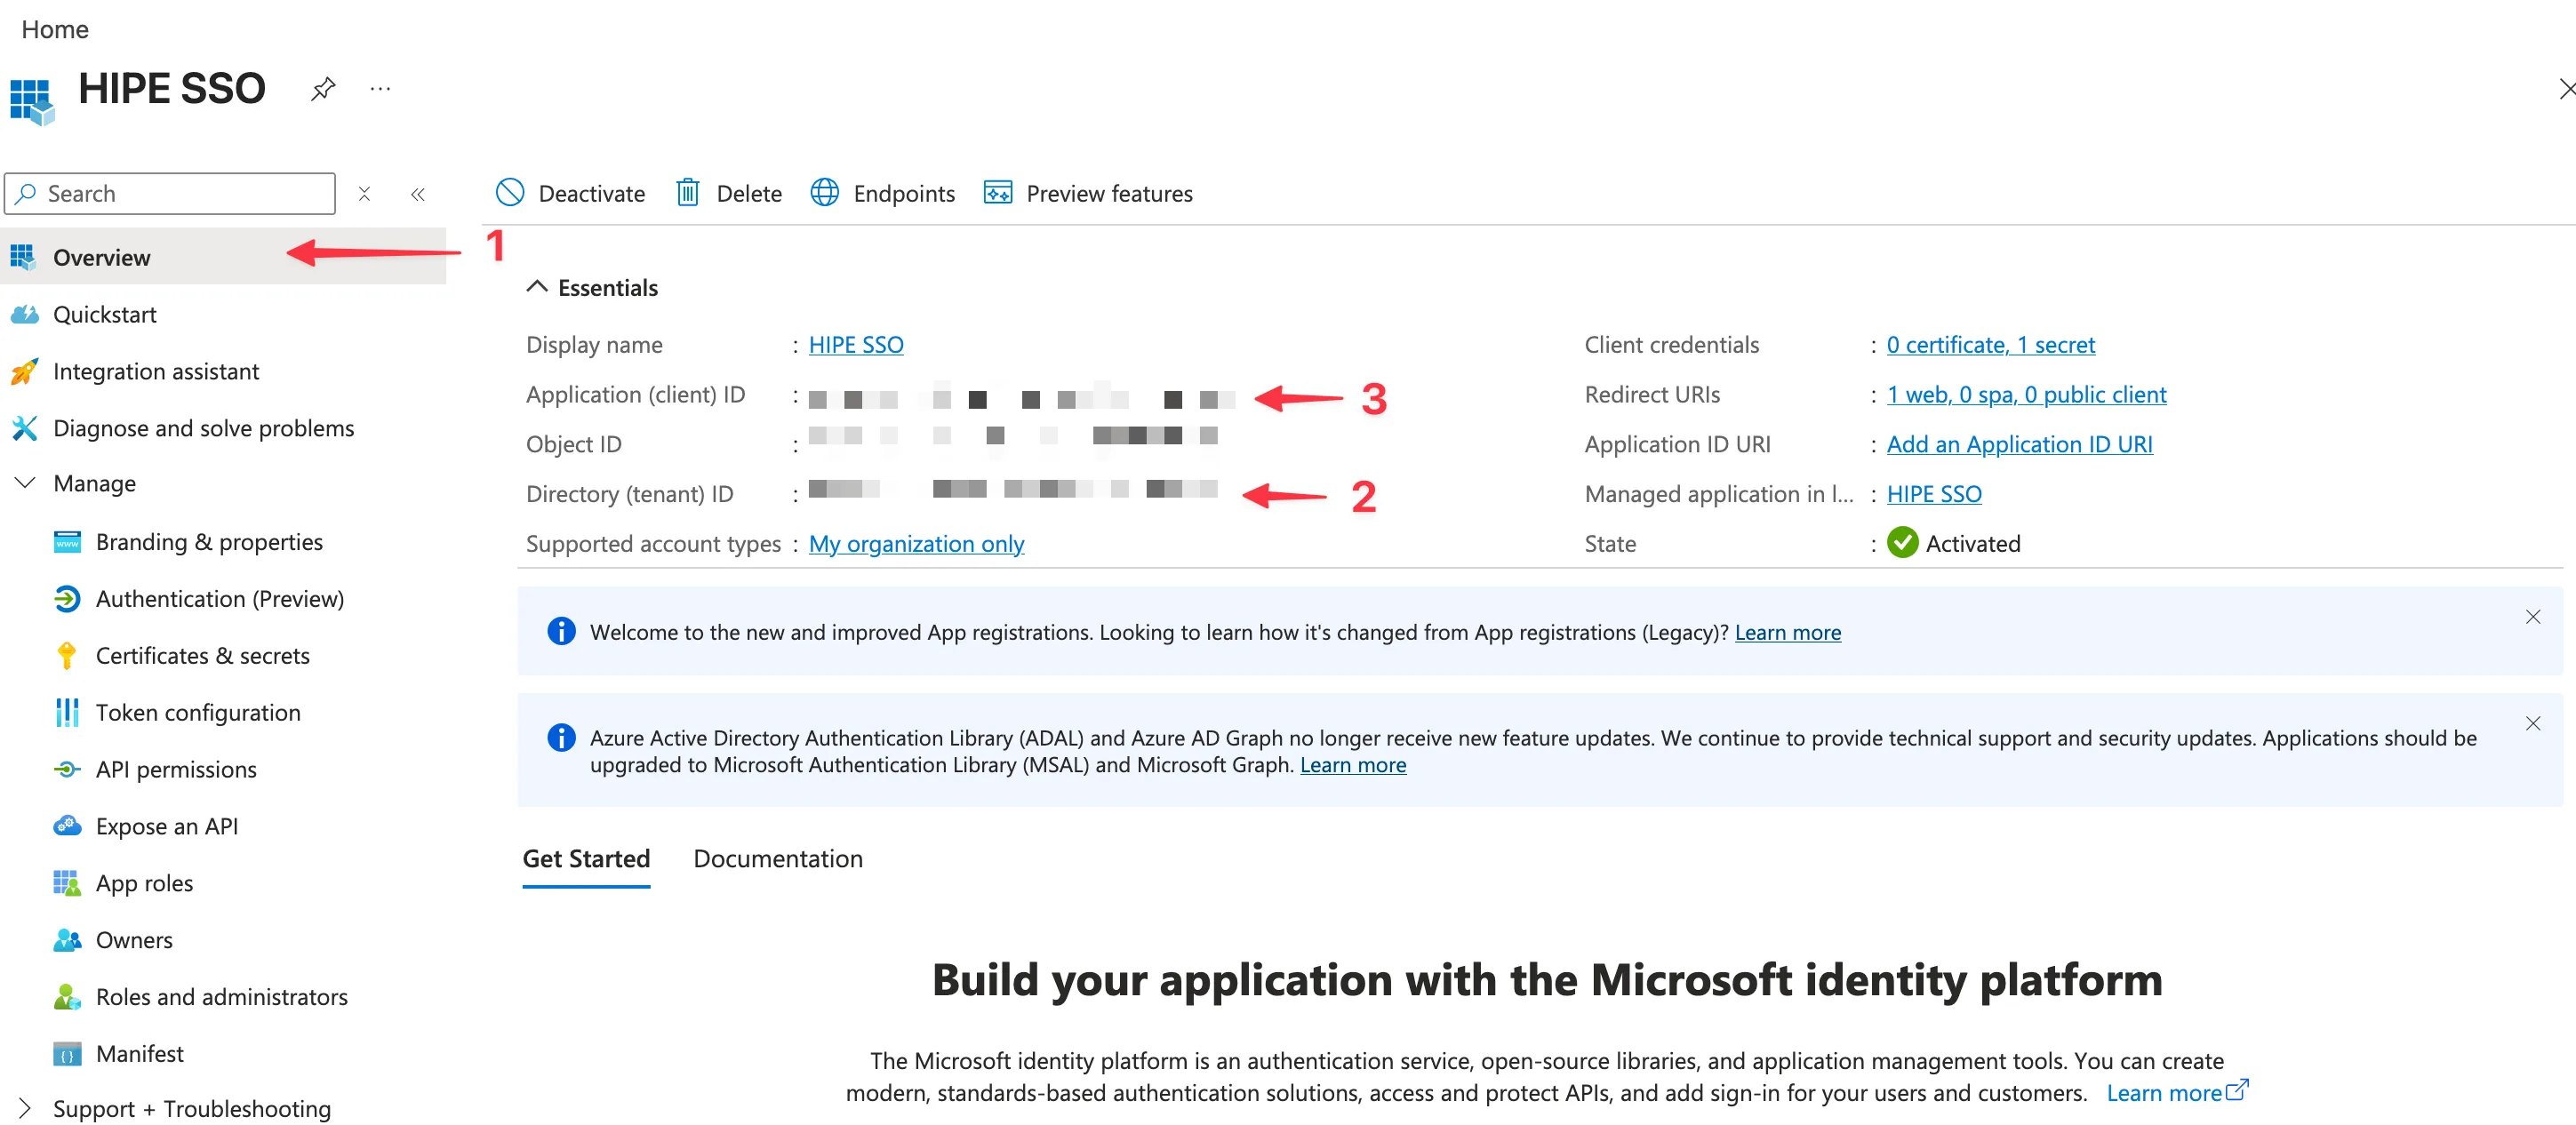
Section titled “6. Create discovery endpoint”- In the left navigation, click Overview
- Copy the Directory (tenant) ID (eg:
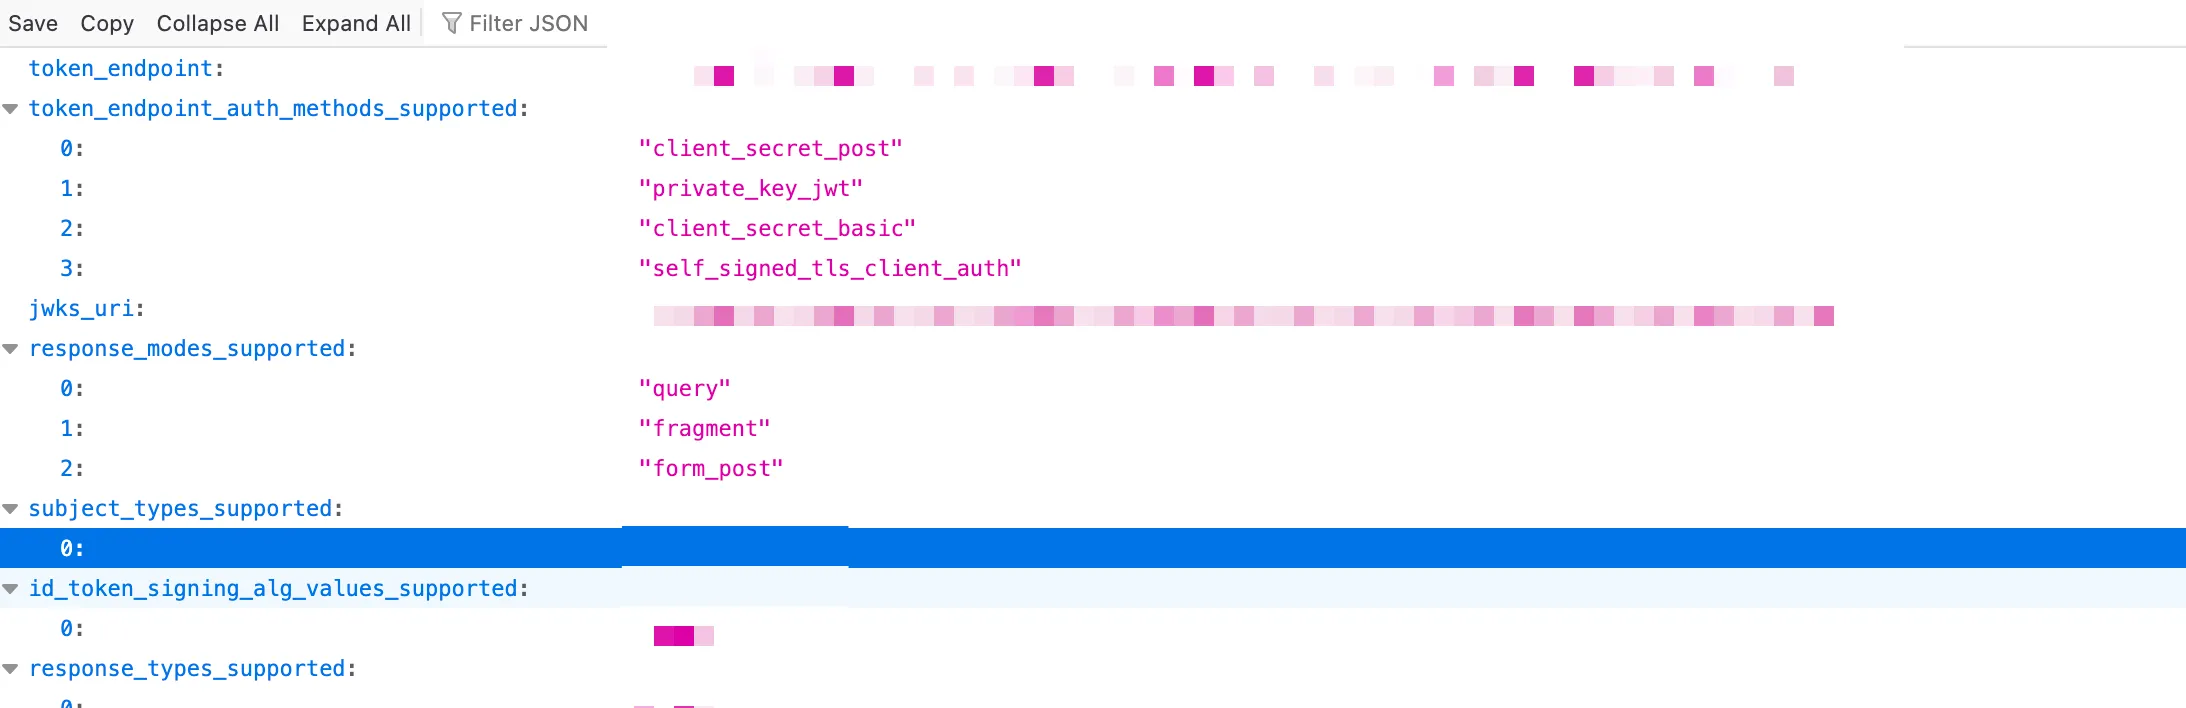
12345678-1234-1234-1234-123456789012) - Go to
https://login.microsoftonline.com/{tenant-id}/v2.0/.well-known/openid-configuration, replace{tenant-id}with the copied ID, if the URL is working - Copy the Application (client) ID and put it in the client ID field (see step below)
- Copy the URL from the previous step and put it in the discovery URL field (see step below)
7. Share credentials with your Customer Success Manager
Section titled “7. Share credentials with your Customer Success Manager”To avoid any issue, please share the following information with your Customer Success Manager, using a One-time secret sharing service such as:
The expected format is:
Client ID: <client-id> (eg: zNR8Q~sdsdad)Client Secret: <client-secret> (eg: sds-aaaa-sdasd-eeee-adasdsd)Discovery URL: <discovery-url> (eg: https://login.microsoftonline.com/{tenant-id}/v2.0/.well-known/openid-configuration)