Microsoft Azure AD - SAML v2.0
Prerequisites
Section titled “Prerequisites”- A Microsoft Entra ID tenant
- Admin privileges to configure applications in Azure AD
- Access to the Azure portal
- The SAML values provided by your Customer Success Manager
- Entity ID (Unique identifier for the service provider)
- Assertion Consumer Service URL (Where Azure AD sends Redirect URI)
Configuration steps
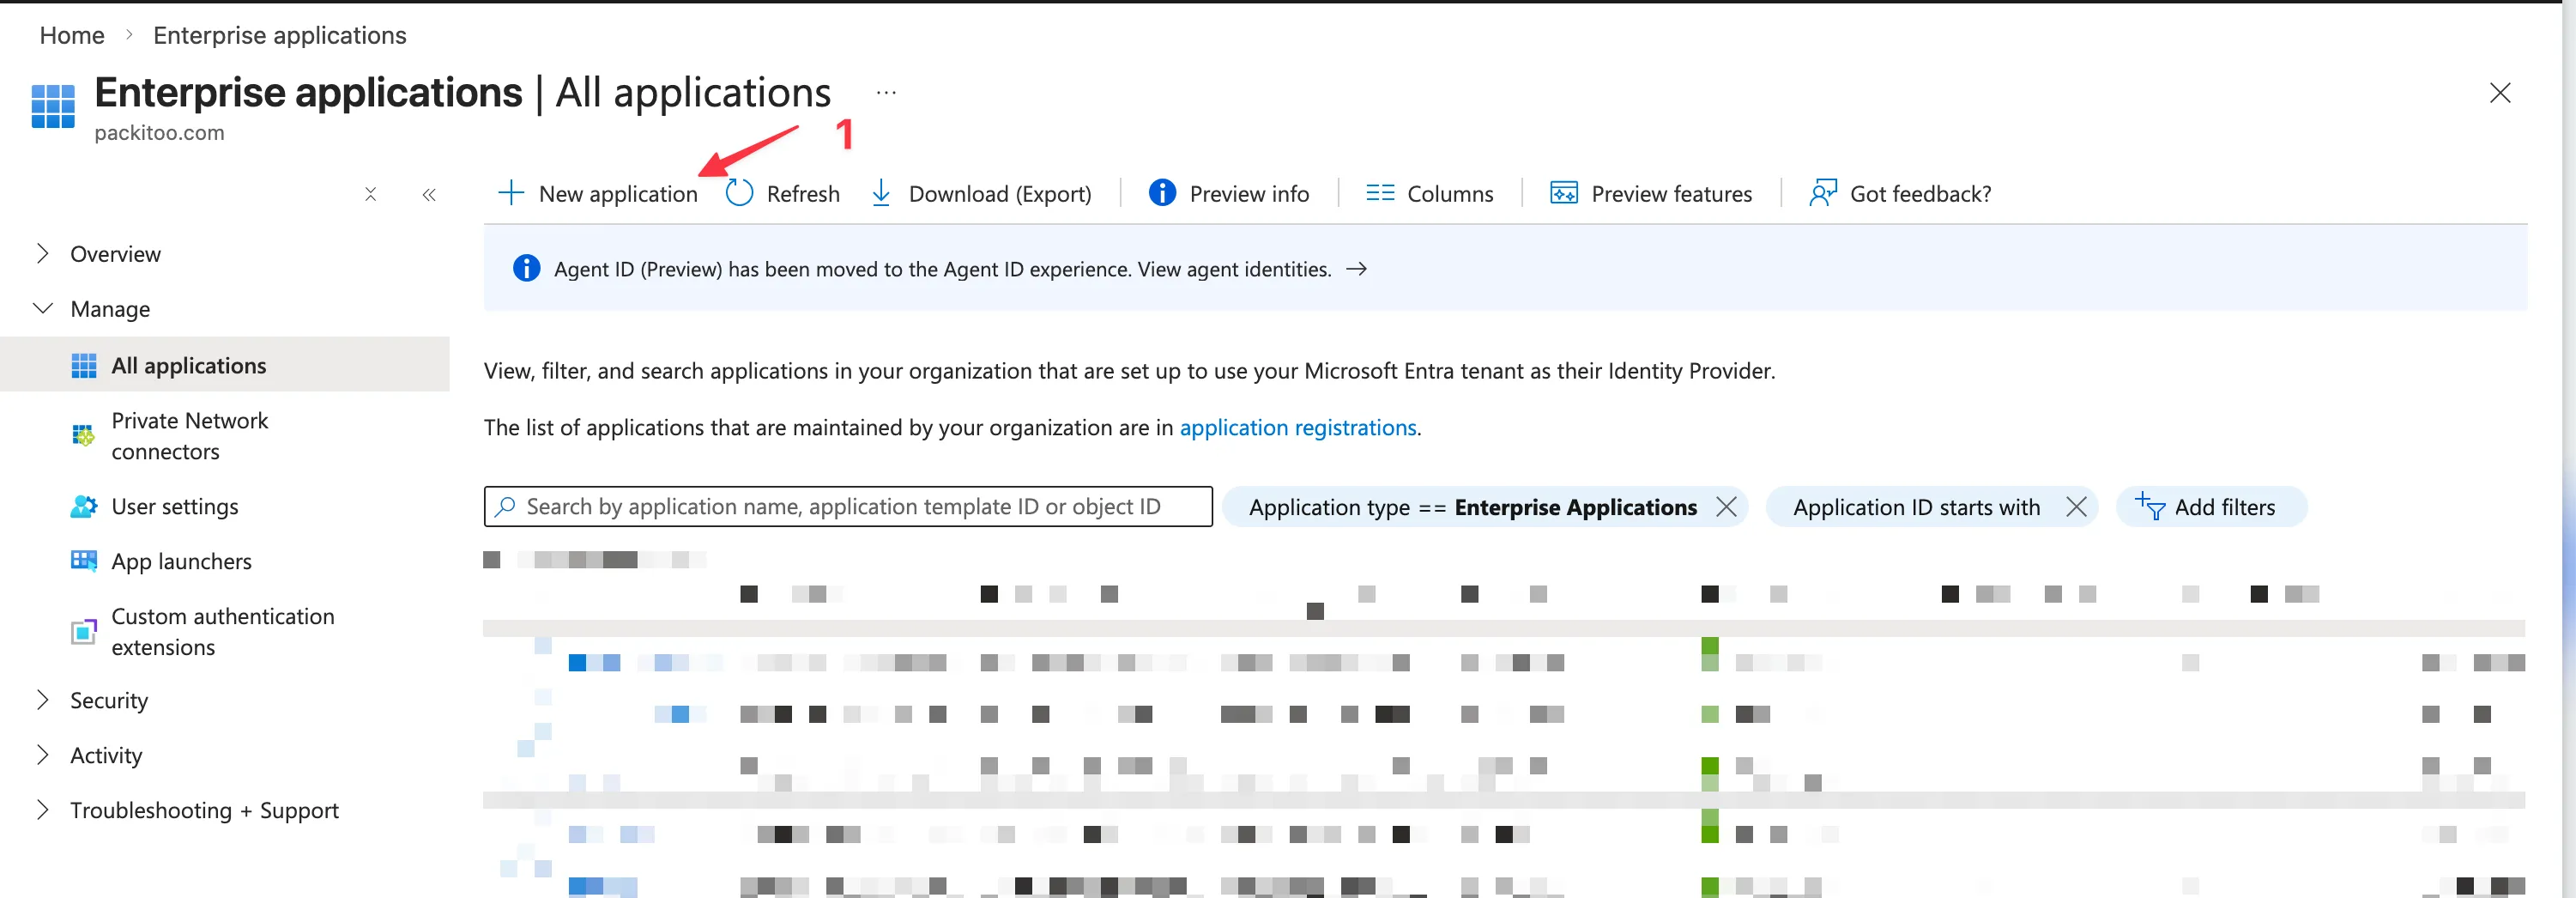
Section titled “Configuration steps”1. Create an enterprise application in Azure AD
Section titled “1. Create an enterprise application in Azure AD”- Go to the Azure portal
- Navigate to Microsoft Entra ID > Enterprise applications
- Click New application
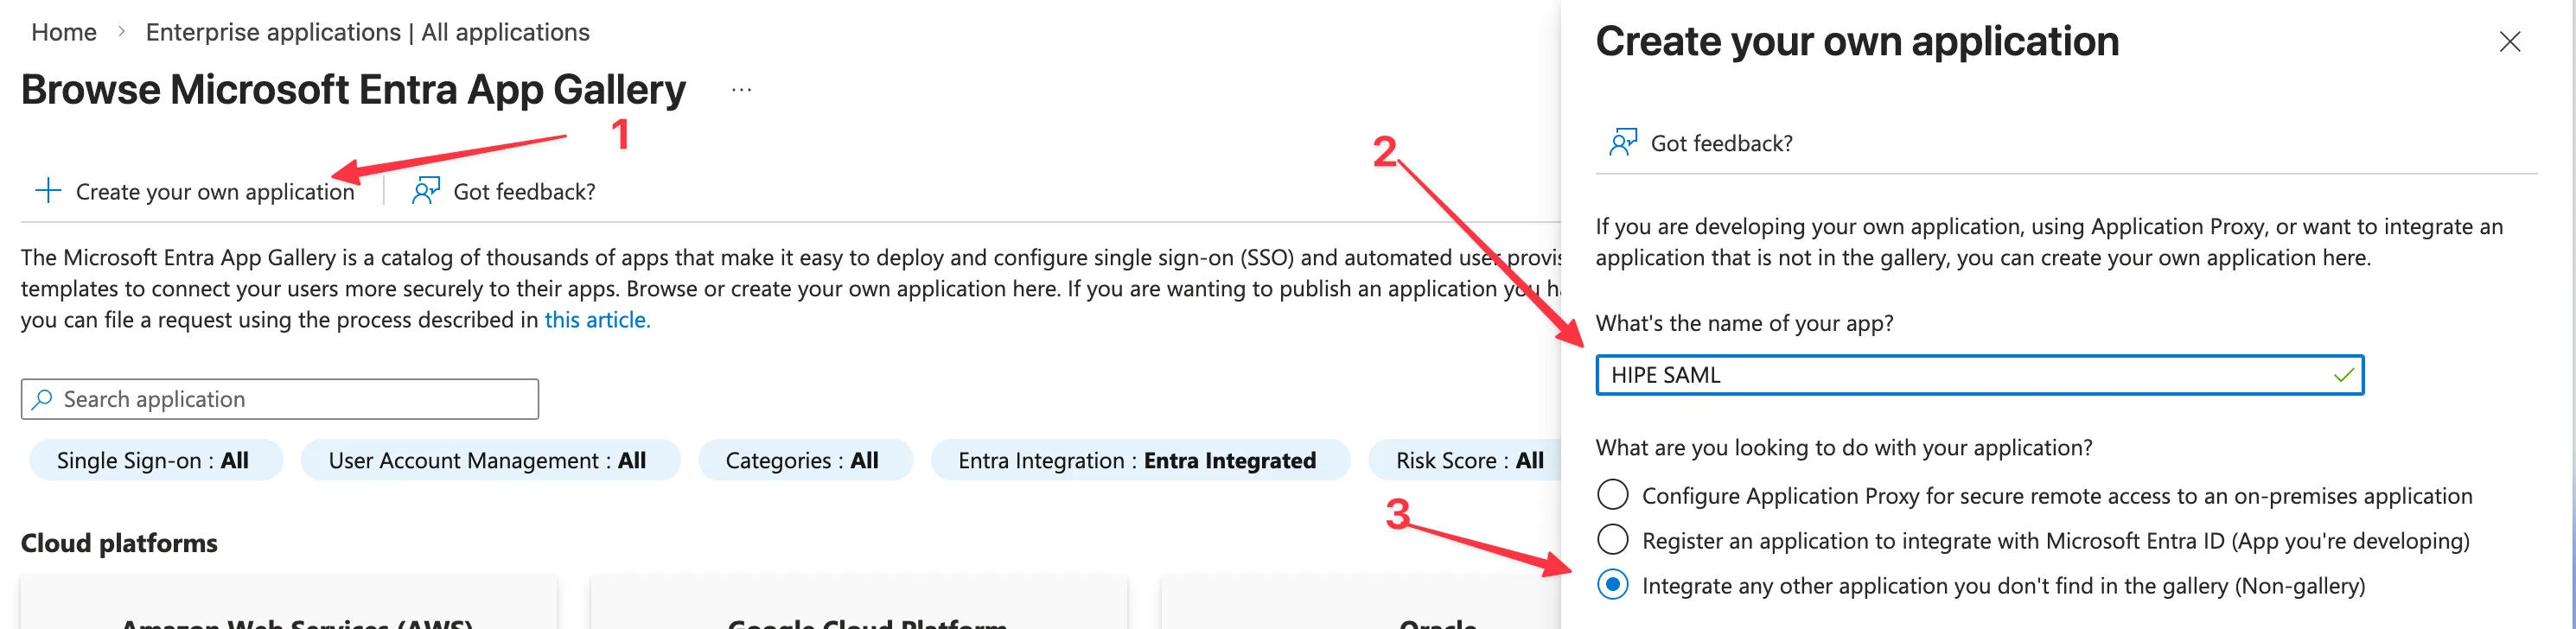
- Click Create your own application
- Enter a name for your application (e.g.,
HIPE) - Select Integrate any other application you don’t find in the gallery (Non-gallery)
- Click Create
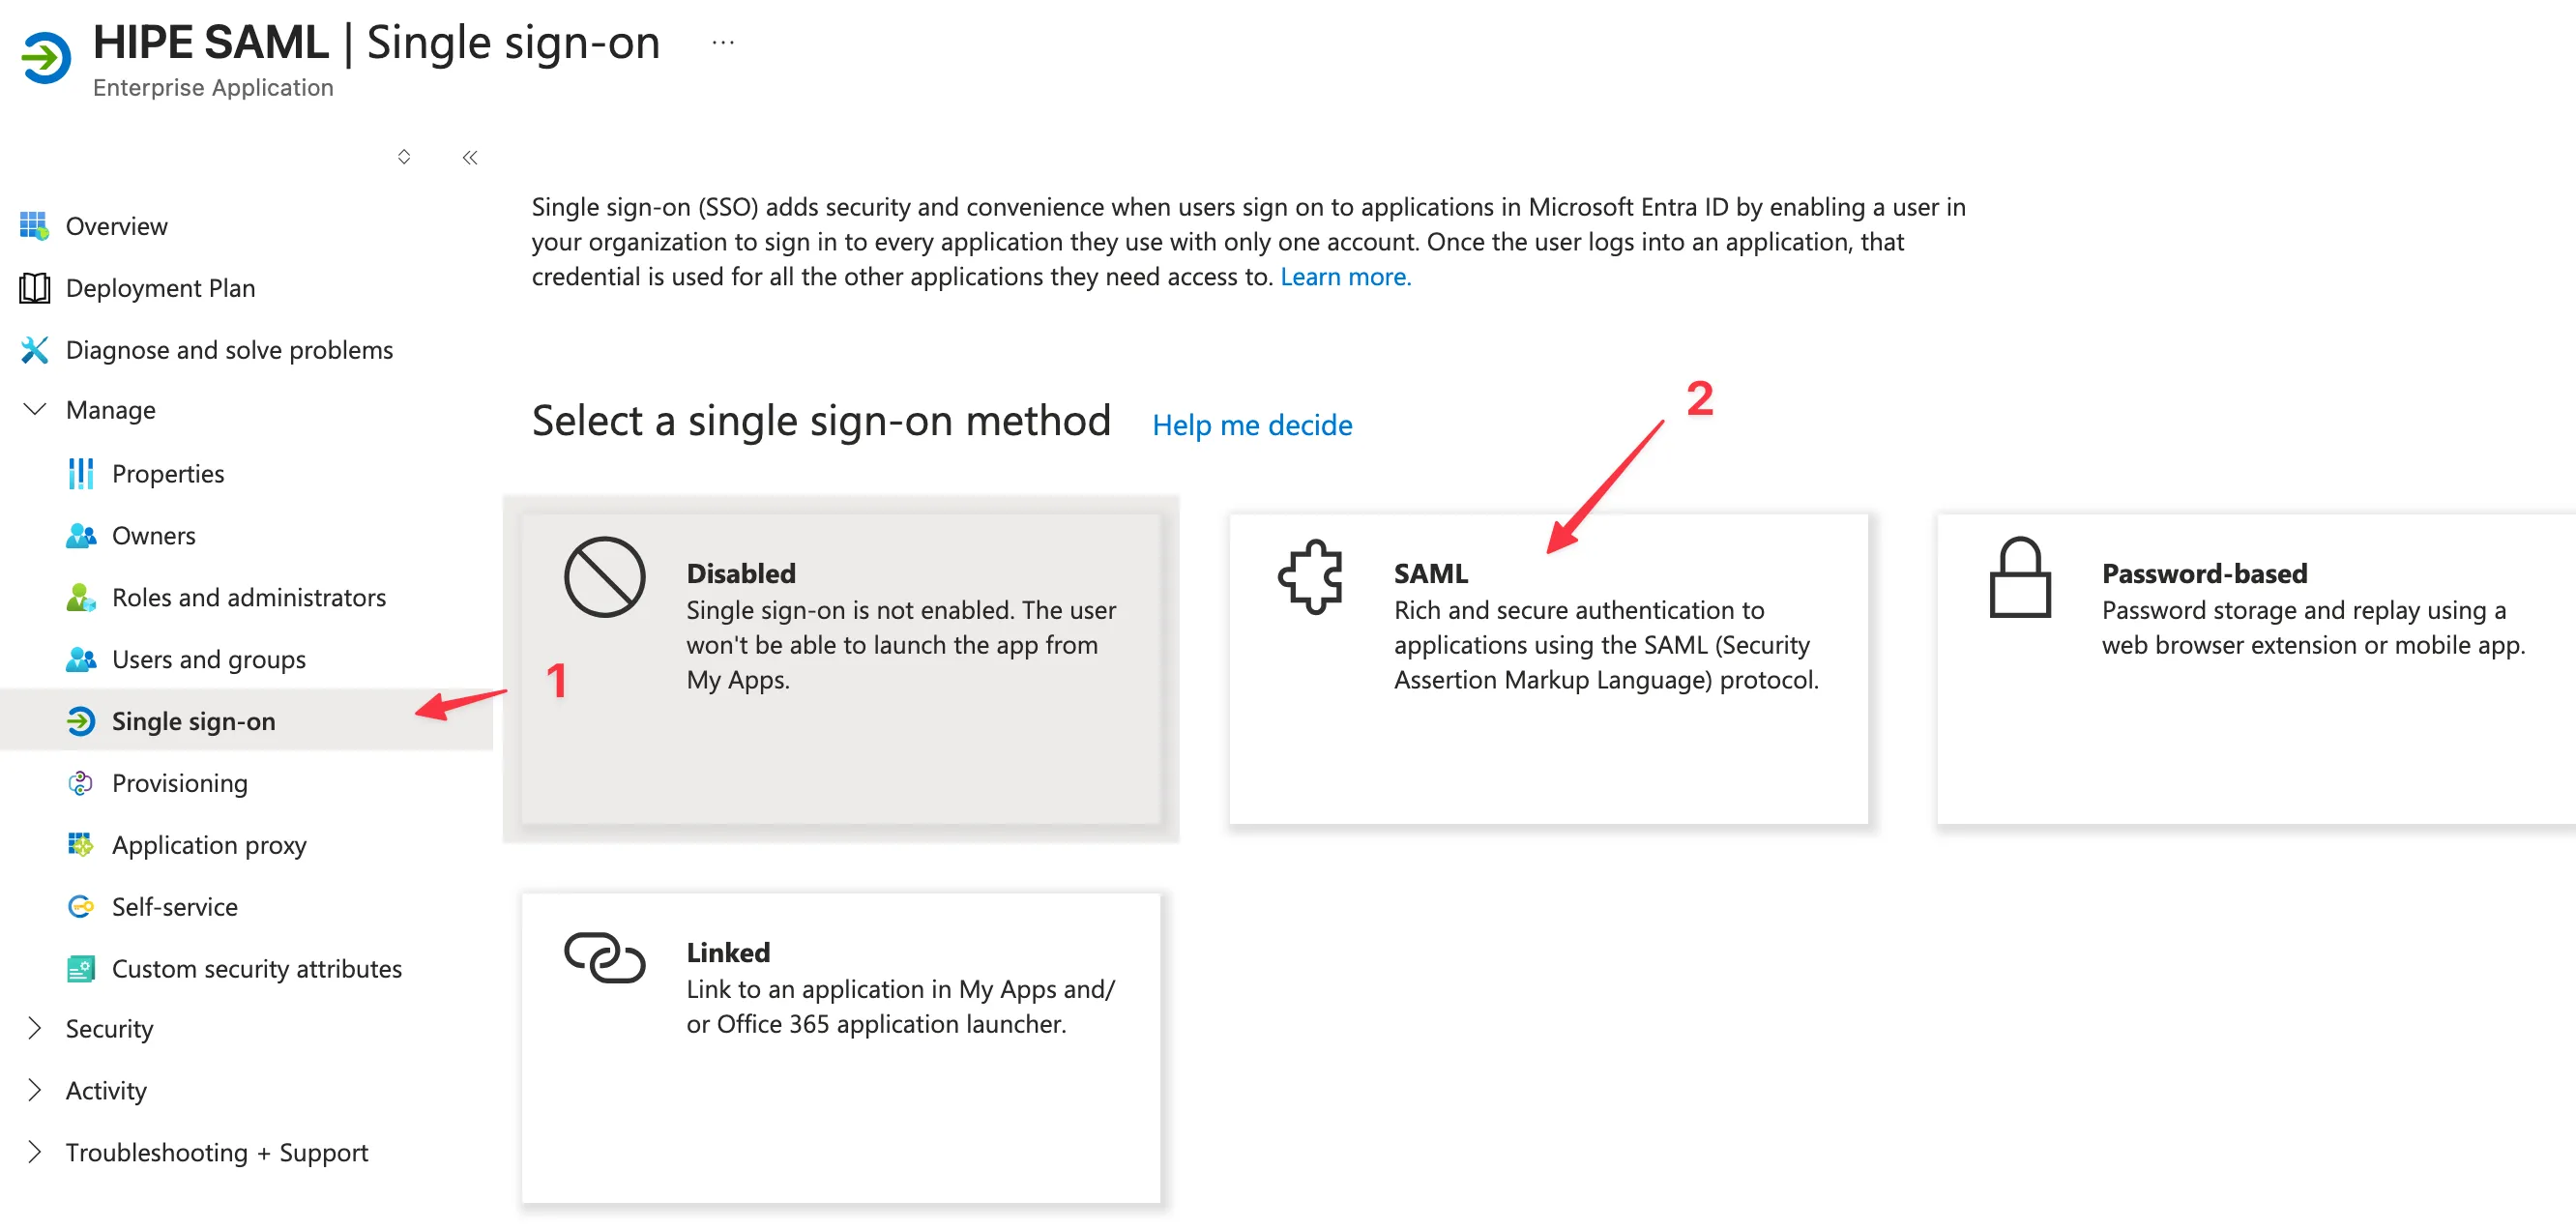
2. Configure SAML single sign-on
Section titled “2. Configure SAML single sign-on”- Open the application you just created
- In the left navigation, click Single sign-on
- Select SAML
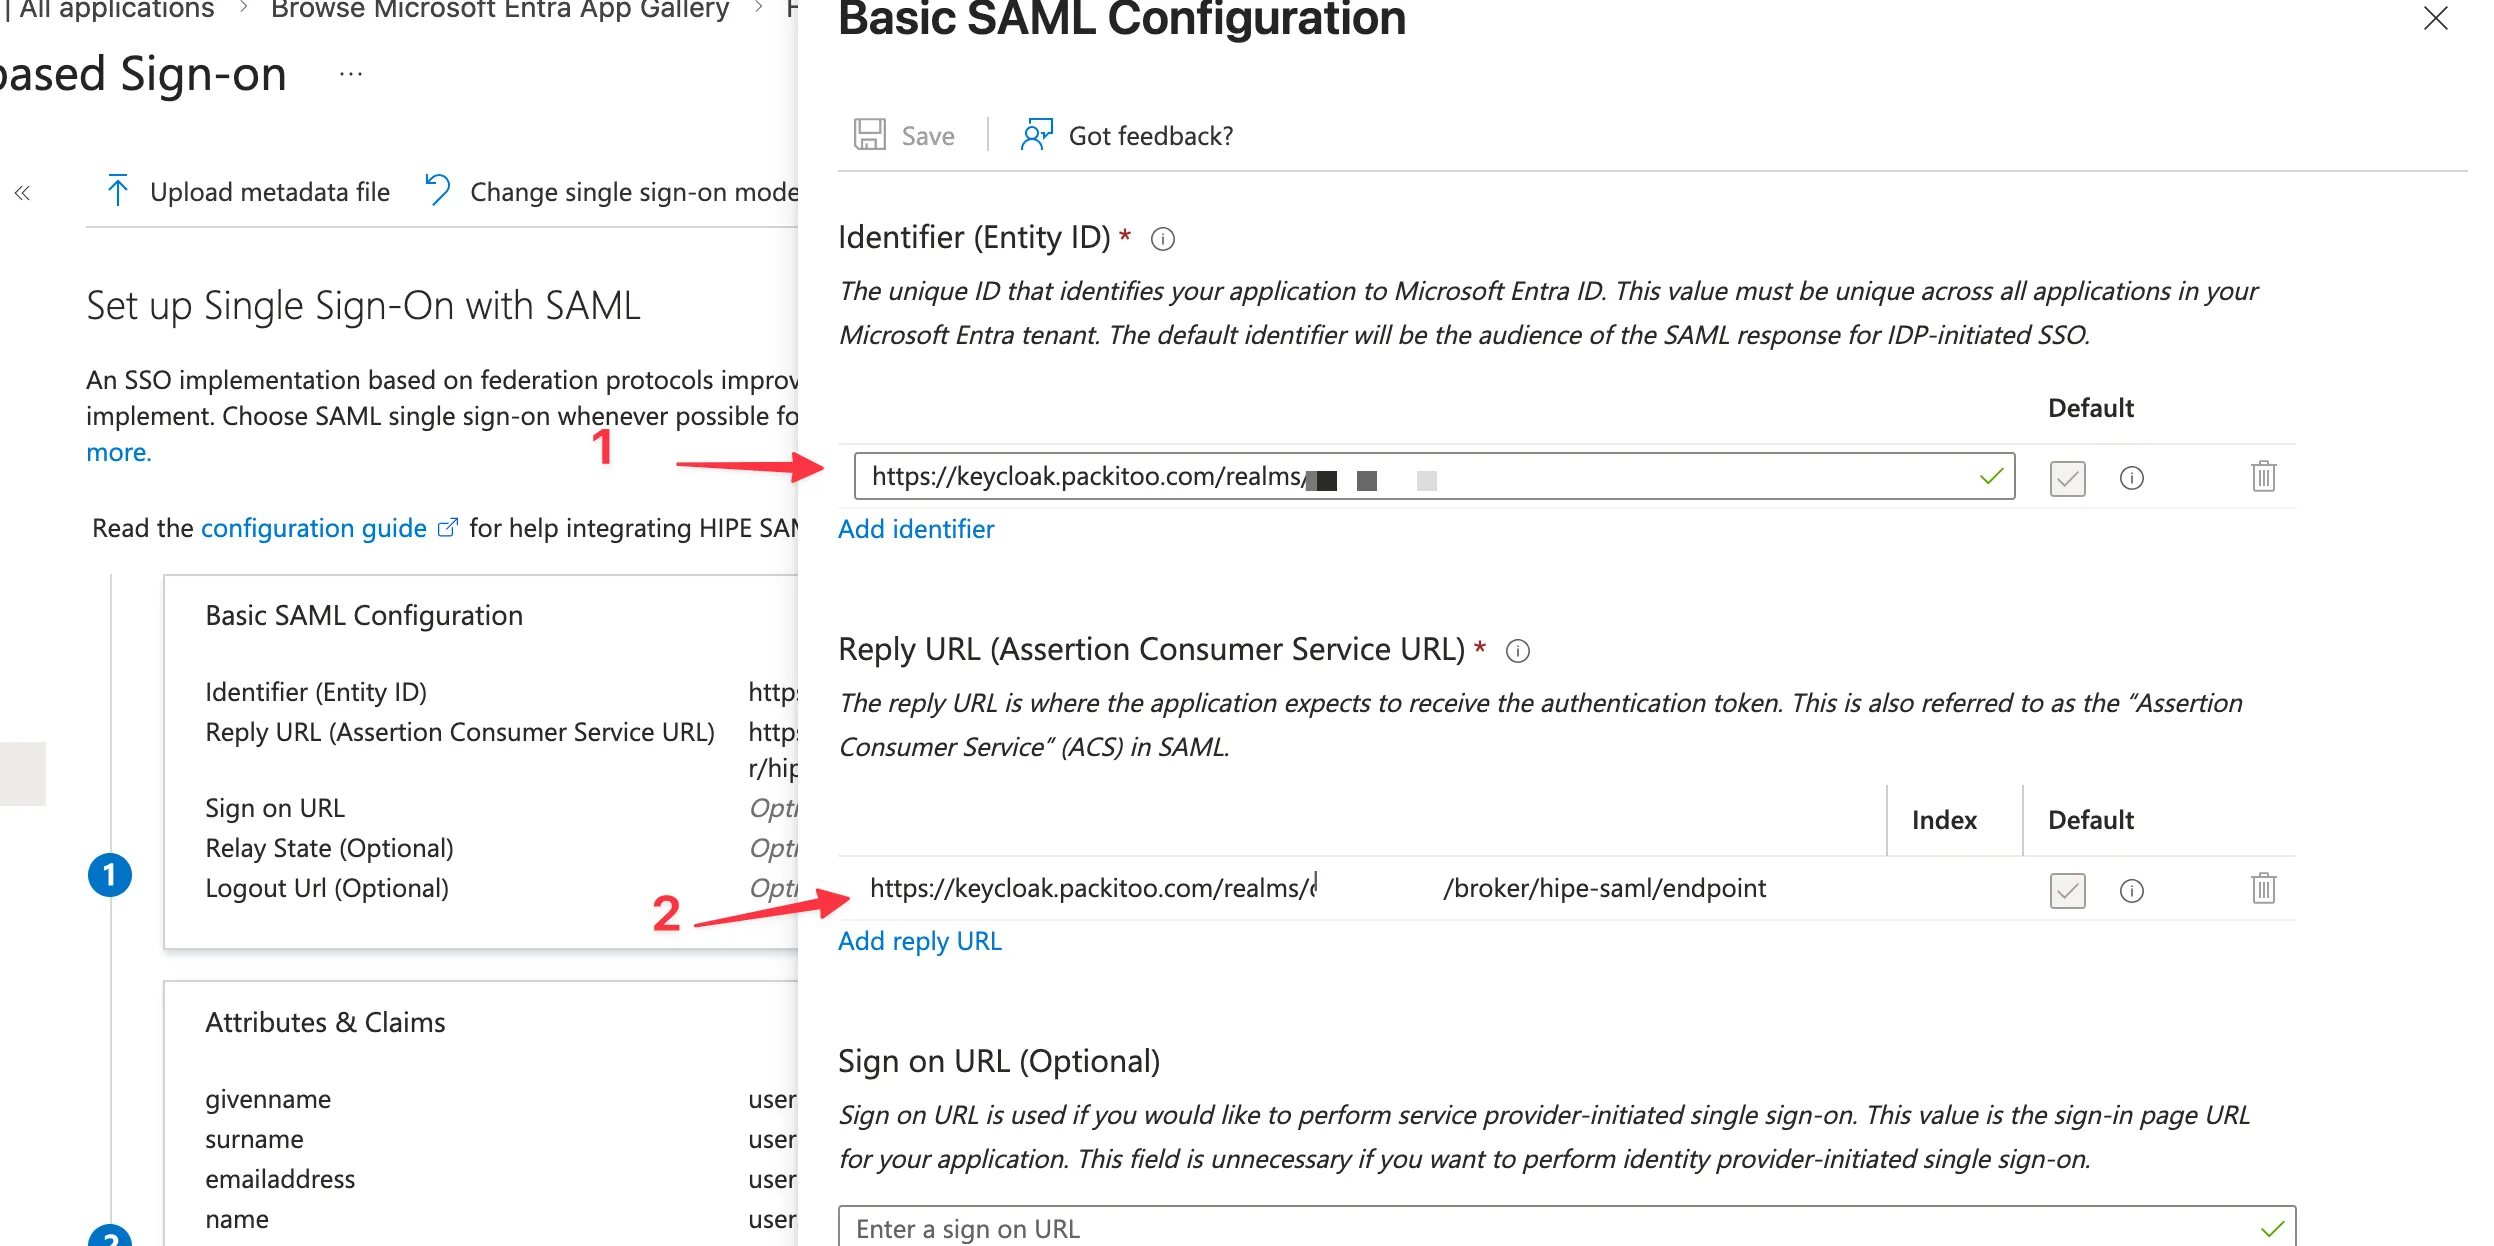
3. Configure Basic SAML Configuration
Section titled “3. Configure Basic SAML Configuration”- In the Basic SAML Configuration section, click Edit
- Fill in the values provided by your Customer Success Manager:
- Identifier (Entity ID)
- Reply URL (Assertion Consumer Service URL)
- Sign on URL (optional, only if provided)
- Click Save
4. Configure User Attributes & Claims
Section titled “4. Configure User Attributes & Claims”- In the User Attributes & Claims section, click Edit
- Configure the claims so Azure sends the user’s profile information to HIPE
- Use the following recommended mapping:
Claim name Value Unique User Identifieruser.userprincipalnamegivennameuser.givennamesurnameuser.surnameemailaddressuser.mailnameuser.userprincipalname - If
user.mailis empty in your tenant, ask your Customer Success Manager which attribute should be used for the email claim before changing it - Save the configuration
If the required claims are missing or empty, Keycloak may display an Update Account Information screen after login and ask the user to manually enter their username, email, first name, or last name.
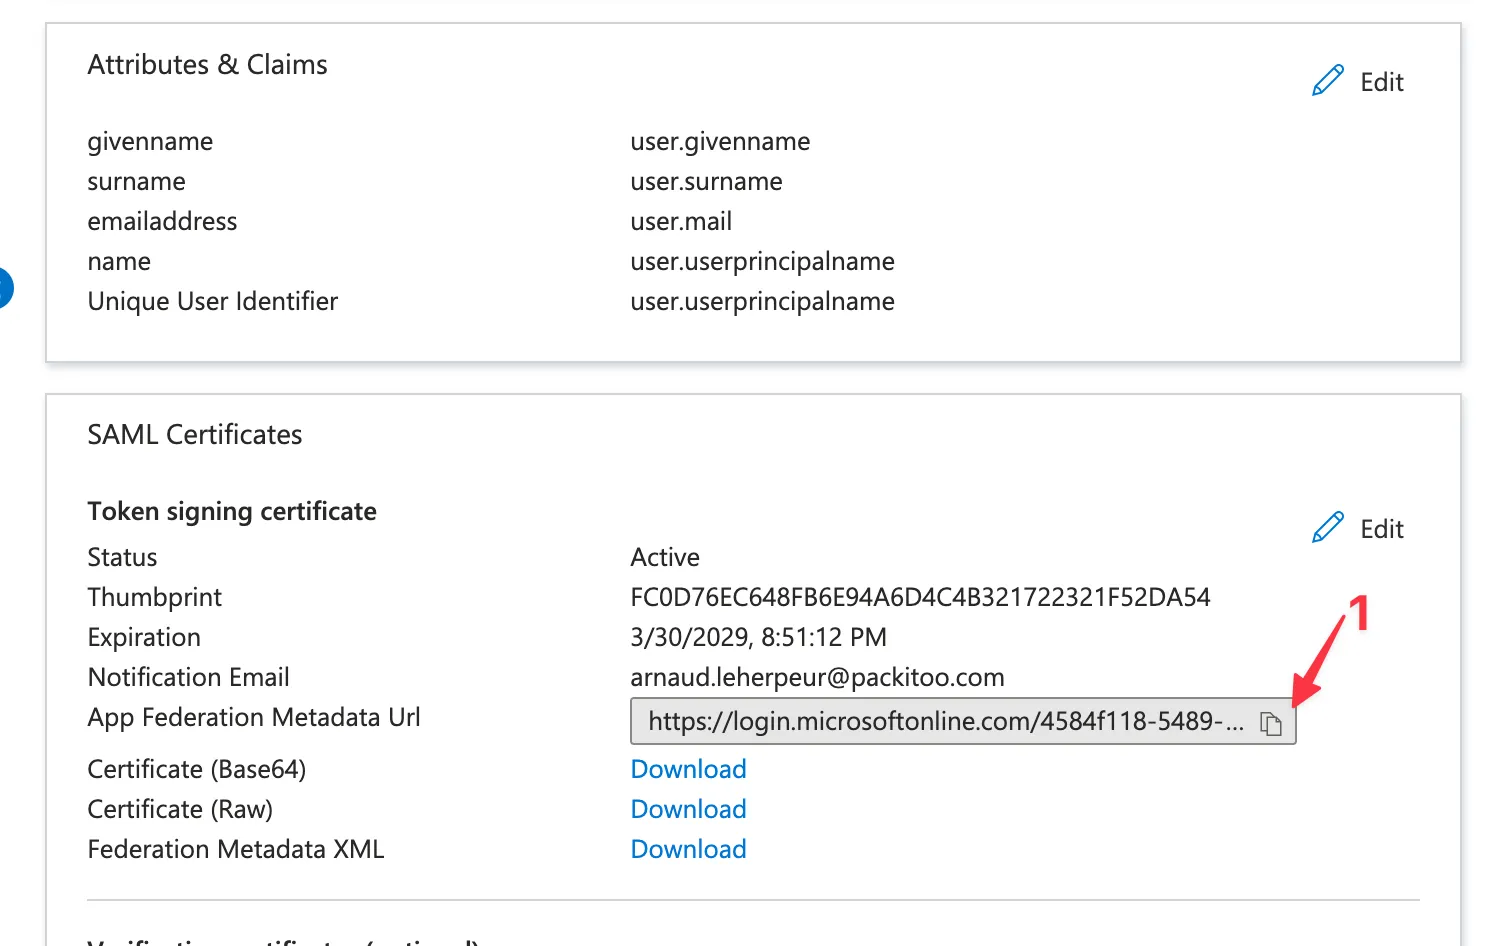
5. Download the signing metadata
Section titled “5. Download the signing metadata”- Copy the App Federation Metadata URL
- Save this information for later
6. Share credentials with your Customer Success Manager
Section titled “6. Share credentials with your Customer Success Manager”To avoid any issue, please share the following information with your Customer Success Manager, using a One-time secret sharing service such as:
The expected format is:
App Federation Metadata URL: <app-federation-metadata-url>